Thursday, April 30, 2009

chocolate dessert cakes

This is the last recipe I'll be posting from last Saturday's dinner (we have friends coming over again this weekend, so there maybe a new evening's worth of recipes to post next week!). These cakes were the perfect ending to a great night - warm chocolatey goodness. Need I say more?

This is another recipe from Donna Hay's The Instant Cook. I can honestly say that I haven't made a single thing out of her cookbook that I haven't totally loved (which is a lot of negatives in one sentence - I guess I should say I've loved everything I've made from this cookbook!). Here's how it goes:

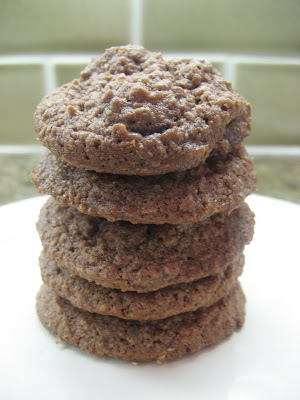
Chocolate Dessert Cakes
Serves 4

3/4 c. butter, melted
1 c. caster (superfine) sugar
1/3 c. brown sugar (I used light muscavado)
3 eggs
1 1/4 c. flour
1 tsp. baking powder
1 c. good quality cocoa (I used Scharffen Berger)

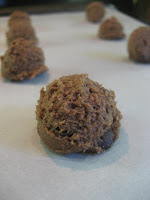
Preheat oven to 320 degrees (yes, that's a strange oven temperature; the cookbook author is Australian, so I've converted grams to cups and celsius to fahrenheit). Place the butter, sugars, and eggs in a bowl and mix until combined. Sift over the flour, baking powder and cocoa mix until combine. Divide evenly between 4 6 oz. oven-proof ramekins.

Bake 20 minutes. This should yield cakes that are firm to the touch (spongy/cakey on the outside) and fudgey in the middle. YUM. We ate ours warm, topped with fresh strawberries, a dallop of whipped heavy cream, and mint.

Wednesday, April 29, 2009

caramelized apple, sage, and goat cheese salad

I'm on a sage kick. This salad is one of my new favorite things. I've made it three times this week (I'm not kidding). I made it for the first time last weekend and pretty much haven't been able to stop eating it since!

The recipe is from Donna Hay's The Instant Cook. One thing I really like about this cookbook (besides the beautiful pictures) is that there are variations for many of the recipes. The main salad featured (the following one is a variation of it) is "caramelized pear and rocket salad". I actually tried the original with pear and blue cheese when Marika was over last night. It was good, but I think I like the apple, sage, goat cheese variation even better. Here's how it goes:

Caramelized Apple, Sage & Goat Cheese Salad
Serves 4

4 Tbsp. butter
3 Tbsp. white wine vinegar
1 Tbsp. brown sugar (I used light muscavado)
1 Tbsp. fresh sage leaves
2 apples, cored, and quartered
1/2 cup walnuts
5 cups baby spinach
5 oz. goat cheese

Heat the butter, vinegar, and sugar in a frying pan over medium heat. Add the apple, walnuts, and sage and cook for 4-6 minutes, until the apple begins to soften. Place the spinach on serving plates and top with warm apple mixture. Spook over the pan juices and top with goat cheese.

Tuesday, April 28, 2009

camembert & caramelized onion crostini


I think this might be my favorite new appetizer recipe. I made it over the weekend when Todd and Rachael came over for dinner. I'm making it again when Marika comes over tonight. The recipe is from Vegetarian Food for Friends. It goes like this:

Camembert & Caramelized Onion Crostini
Makes 12

1 baguette loaf, thinly sliced
1 Tbsp. olive oil, plus extra for brushing
1 garlic clove
1 onion, quartered and then thinly sliced
1 tsp. brown sugar (I used light muscavado)
a pinch of salt
4 oz. Camembert cheese, thinly sliced
sprigs of thyme

Put the slices of bread on a baking tray and lightly brush each side with olive oil. Toast in preheated oven 400 degrees until both sides are lightly golden. Rub the garlic clove over one or both sides of the toast.

Meanwhile, heat 1 Tbsp. of olive oil in a medium saucepan. Add the onion and cook gently for 10 minutes until softened. Stir in the sugar and a pinch of salt.

Put a thin slice of Camembert on each crostini, then pile the onion mixture on top. Sprinkle with tiny sprigs of thyme.

Monday, April 27, 2009

fava bean bruschetta

I bought fresh fava beans for the very first time to make this recipe. To be honest, I'm not sure I've ever eaten fresh fava beans before. They are a bit of work - encased twice in pod and spongy skin - but worth it for the fresh taste of springtime.


The recipe is from Organic Marin: Recipes from Land to Table. It goes like this:

Fava Bean Bruschetta

1 pound fava beans, shelled
1 clove garlic, minced
1 Tbsp. freshly squeezed lemon juice
1/2 Tbsp. fresh thyme, minced
1/4 c. extra-virgin olive oil
1/2 tsp. sea salt
1/4 tsp. freshly grated pepper
1 sourdough baguette

Bring a large saucepan of salted water to a boil over high heat. Blanch the fava beans for 5 minutes, then drain and plunge into an ice-water bath. Once the beans are cool, peel them by pinching off the skin.

Put the beans in a food processor. Add garlic, lemon juice, and thyme. Pulse for several seconds until the beans are coarsely chopped. With the machine running, add the 1/4 cup olive oil until well combined. Stir in the 1/2 teaspoon salt and pepper. Set aside.

Preheat an oven to 350 degrees. Cut the baguette into 1/4-inch diagonal slices. Using a pastry brush, coat both sides of he bread slices with 2 tablespoons olive oil. Place the bread in a single layer on a baking sheet and toast in the oven 10-15 minutes, until light golden brown. Remove from the oven and let cool for 5 minutes.

Using a butter knife, spread 1 teaspoon fava bean puree on each toast. Sprinkle lightly with sea salt. Serve at room temperature.

I just asked JR for his thoughts on the bruschetta, and he offered this tidbit: "its subtle sweetness danced like angels on my tongue, tiny angels." Those who know JR will appreciate that treasure.

Sunday, April 26, 2009

food & friends

Our friends Todd and Rachael came over for dinner last night. Which meant that I got to spend a good part of the day yesterday delving through recipes and planning the meal (one of my favorite past times!). I think everyone had a nice evening. The food was good. The wine was flowing. The conversation was great.


My theme for the evening's food was fresh herbs - every dish had some in it. Here's what was on the menu:

Marinated Mushrooms

I'll post the recipes over the next few days. Stay tuned!

Thursday, April 23, 2009

beet ketchup

I really want to like beets. As much as I try, it doesn't seem to be happening. But they keep appearing in the CSA box, so I've been attempting new and varied recipes to see if my taste for beets (or lack thereof) will change. I've tried them plain, roasted them with orange and cilantro, made salads of them with balsamic and feta.

Each time, they turn out beautiful.

But they still taste like beets.

Why do I want to like beets? Any produce colored that intensely purple has to be packed with nutrients. The Complete Guide to Nutritional Health confirms it - beets are highlighted as a superfood for the immune system - the beet's "unique mixture of minerals and phytochemicals resists infection, boosts cellular intake of oxygen, and treats disorders of the bood, liver, and immune system." Beets are nutritious, easy to digest, and a rich source of minerals. They contain vitamins A, B, C, iron, potassium, zinc, and a host of other good-for-the-body stuff. But I still don't like them.

Why in the world am I featuring a recipe on beets, then, you might ask? Through all of my failed attempts at enjoying beets, my most recent one comes the closest. I actually ate some of this past the first bite. And it wasn't bad. So I figure, if someone who doesn't like beets thought it was ok, someone who loves beets would find it fantastic. To you beet lovers out there, I'd recommend giving this recipe a shot.

Beet Ketchup*
Makes about 4 cups

1 onion, diced
3 cloves garlic, minced2 c. red wine vinegar
1 c. sugar
3 c. cooked beets

Combine all ingredients in a large pot. Bring to a boil, then reduce heat and simmer 45 minutes. Use a blender or food processor and puree until smooth. (I used the immersion blender, which I actually wouldn't recommend - it took a really long time - the upright blender or a large food processor is probably your best option).
*The base recipe is from Fresh
. My twists were to roast the beets before making the ketchup and I also substituted muscavado sugar for white sugar. I will repeat both of these changes if I make this again.

We dipped sweet potato fries into our beet ketchup. And we'll be doing more with it, as there is still plenty left and I've been told it will last in the fridge in an airtight container for up to a month. What will you do with yours?

Sunday, April 19, 2009

rice noodle salad


JR and I drove to the ocean yesterday. In addition to watching Romeo the pug frolic in the sand, this meant that we got to stop at one of the roadside stands and pick up some fresh produce (yay!). We came away with a mix of items from California (and a couple from Mexico): mangos, tomatoes, cucumber, garlic, yams, and some beautiful green beans. 

I know this sounds strange, but I was really hoping to find a cucumber (and was momentarily saddened when I learned that what I saw from a distance as I approached the stand and thought to be a cucumber was really a small zucchini, but then I saw the cucumbers and all was good). I needed one for the salad I'd been thinking about since I woke up in the morning to sunshine and 70 degrees. We ate it for dinner last night and it was the perfect end to a long day in the sunshine. Here's how it went:

Rice Noodle Salad
Serves 4

8 oz. thin rice noodles
3 Tbsp. fresh lime juice
2 Tbsp. sesame oil
2 Tbsp. honey
1 Tbsp. mirin
1 Tbsp. rice vinegar
1 small cucumber, sliced then halved
1 medium carrot, cut into small matchsticks
1/2 c. cilantro, roughly chopped
black sesame seeds

Heat water in a pot to boiling. Add the rice noodles, turn off the heat, and allow to soak for 10 minutes.

While the noodles are soaking, make the dressing by combining lime juice, sesame oil, honey, mirin, and rice vinegar. Set aside while you chop the veggies.

When the noodles are done cooking, drain under cool water.

In a large bowl, combine the cooled rice noodles with the veggies and dressing. Mix well. Serve in individual bowls topped with a sprinkling of black sesame seeds. 

I served this salad with tofu, sweet pea & portobello stir fry.

Note: this salad was even better on day #2 when we had the leftovers for lunch and the rice noodles soaked up more of the dressing. Make the salad a couple hours (or a day) ahead of time and keep in the fridge until ready to eat for full flavor!

Rice Noodle Salad on Foodista

tofu, sweet pea & portobello stir fry

It's the weekend, so I'm back to cooking (yay!). I've had two days of my favorite types of weekend mornings - sitting in the sun on our porch with a cup of coffee, cooking magazines, and cookbooks. Pouring through recipes gives me ideas for new things to try.

Often seeing recipes reminds me of an ingredient or a preparation method and then my mind wanders, thinking about what I have in my kitchen at the moment and what flavors I'm in the mood for. The rice noodle salad that I'll be posting right after this was initially sparked by a recipe for spring rolls from one of my cookbooks. Seeing the recipe made me think of the spring rolls JR and I had with our friends Todd and Rachel from Typhoon in Palo Alto. I don't have rice paper on hand (and was unable to find it in the grocery), so made a salad version with rice noodles.

Once I settled on the salad, I needed something to accompany it. We had sweet peas on hand from the last CSA delivery. I love the combo of peas and mushrooms, so picked up a portobello while at the grocery. I realized nothing on the menu thus far included protein, so decided to include some tofu as well. Here's how it went:


Tofu, Sweet Pea & Portobello Stir Fry
Serves 2

2 Tbsp. coconut oil
6 oz. tofu, drained and cut into squares
2 handfuls of sweet peas, trimmed and sliced in half diagonally
1 portobello mushroom, sliced and then cut into 1-2" pieces
2 cloves garlic, minced
3 Tbsp. honey
3 Tbsp. tamari
3 Tbsp. rice vinegar
2 tsp. sesame oil
1 tsp. chinese chili paste
1/2 tsp. lime juice
sesame seeds

Mix sauce ingredients (garlic through lime juice) in a small bowl. Set aside.

Heat coconut oil in a wok over medium high heat. Add tofu. Stir and cook about 5 minutes, or until tofu begins to brown. Add peas to the wok; stir and cook 2 minutes. Add mushrooms to the wok, stir and cook 2 minutes. 

Add sauce to wok. Stir and cook until sauce begins to thicken (about 2 minutes). Sprinkle with sesame seeds and enjoy!

Thursday, April 16, 2009

goat cheese salad


My posts have been infrequent lately. My day job has been spreading into the evenings (and nights), which it looks like might continue for a while. So lately, this means either someone else is making dinner (earlier this week, JR made a fantastic dinner - we'll see if I can get him to write a guest post at some point; last night dinner was made by the local pizza place) or it has to be quick and mindless (as I'm rather brain-dead by the time I get home!).

This salad (along with the vinaigrette that tops it that I posted earlier in the week) has been a recent staple. It uses the fresh greens from the garden (or, like tonight, from the CSA delivery). It's quick. It's super tasty. Here's how it goes:

Goat Cheese Salad
Serves 2

3 oz. goat cheese
a handful of walnuts, chopped
olive oil
spinach (or lettuce)
leaves from 3 sprigs fresh oregano
a handful of cherry tomatoes, halved
freshly ground black pepper

Make vinaigrette and set aside. Put spinach, oregano leaves, and tomatoes in a large bowl. Sprinkle with freshly ground black pepper. Set aside.

Cut the goat cheese into 4 rounds (about 1/4 inch thick each). Take each round and set it on your pile of chopped walnuts, pressing lightly so the walnuts stick. Turn over and repeat on the other side.

Heat olive oil in a pan over medium heat. Once hot, add the cheese rounds. Allow to cook for about 2 minutes, then flip and cook about 2 minutes more. The ideal you're aiming towards is for the walnuts to brown slightly and the cheese to start to melt, but not totally fall apart. The colder the cheese, the easier this is, so I recommend taking it out of the fridge right before you slice and cook it.

While cheese rounds are being heated, toss the balsamic vinaigrette with salad. Put servings in individual bowls or on individual plates. When cheese rounds are ready, remove them from the pan and place two on each salad.

As I mentioned, this has been a staple lately (I'm serious - tonight is the third time I've made it this week!). I've been playing with variations - added some thinly sliced red onion last time, it's also good with a big leaf of thinly sliced kale mixed in. Tonight's version substitutes fresh strawberries from the CSA delivery for the tomatoes (and omitted the oregano). Let me know if you have other ideas!

Tuesday, April 14, 2009

basic balsamic vinaigrette

Making salad dressings from scratch is one of my new favorite things. Or dressing, I should say, since mostly I just make the same one over and over again. It all started with the salad garden that I'm growing in a container behind our house. Planting it prompted me to go to a class about growing salad greens (in order to gain some sense of knowing what I'm doing), where I learned how to make the most simple and tasty salad dressing - balsamic vinaigrette. 
Tonight will be the 3rd out of the past 4 nights that we've had salad greens from the garden with this dressing. I'm not sick of it yet!

Basic Balsamic Vinaigrette
Enough dressing for 2 servings of salad

1/2 tsp. sea salt
1 large clove garlic
about 2 Tbsp. balsamic vinegar
about 1 Tbsp. extra virgin olive oil

Note: since the ingredients are few, for the best dressing you'll want them to be high quality (or at least not the super cheap stuff!).


Pour the salt in a small pile on a cutting board. Place the garlic clove on this pile. With the back of a strong fork, press the garlic clove, mashing it into the salt. Continue doing this until you have a thick paste. Transfer the paste to a small bowl. Whisk  together with balsamic vinegar and olive oil. Allow to sit for at least 10 minutes for the flavors to meld. Pour over your favorite salad combination.

Tonight, I'm using this dressing in a spinach salad (spinach leaves fresh from the garden!) topped with walnut crusted goat cheese rounds. Stay tuned for that recipe - coming soon.

Saturday, April 11, 2009

twice baked potatoes: cole's original

I don't think I've had a twice baked potato since I was a kid. That changed last week. My mom reminded me of them when she was visiting. 


Now that I have a fresh memory of how good they are, you'll probably see multiple variations pop up here in the near future (similar to my recent discoveries of frittas and risotto).

The possibilities for mix-ins and toppings are endless. Because of this, twice baked potatoes can be a good "clean out the fridge" dish. Throw in whatever you have that you think will taste good. Serve with some soup or salad, and you have yourself a meal. This version keeps it simple: topped with cheese & meat. I'm going to call it my original twice baked potato recipe.

Twice Baked Potatoes: Cole's Original
Serves 2

2 medium potatoes*
olive oil
coarse sea salt
3 Tbsp. sour cream
1/2 c. sharp cheddar cheese, grated
proscuitto, baked or pan fried until crisp
freshly ground black pepper
*Russet potatoes are the most common for baking. I had several good sized red potatoes on hand (which I would typically use for roasting), which I used this time. The skin of a red potato isn't as thick as a russet, so if you use red potatoes, be careful not to break the skin when scooping out the flesh.

Scrub potatoes under water with a potato brush. Pierce each several times with a fork (this allows the steam to escape while cooking and will keep your potatoes from exploding in your oven). Rub each potato with olive oil, then sprinkle with coarse sea salt. Bake in a dish in a 400 degree oven for 40 minutes.

Remove the potatoes from the oven and reduce oven temperature to 350 degrees. Allow the potatoes to cool enough to be handled. Cut each in half and scoop the flesh into a medium bowl, being careful not to break the skin. Place the skins on a foil-lined baking sheet.

Mash the scooped out potato flesh with sour cream and a generous grinding of black pepper. Scoop the flesh back into the potato skins. Top with proscuitto and grated cheese.

Return to oven and bake until heated through and cheese is melted, 15-20 minutes.

My only issue with these particular potatoes was their lack of green (though we did eat them with a fresh salad from the garden). It hit me while they were in the oven (for their second baking) that I should have included some finely chopped kale. I will definitely do that the next time I make these.

What would you add?

baked taquitos

Believe it or not, this recipe started with mushrooms. 

I had a small brown paper bag of white mushrooms from the CSA delivery. I realize it's not an obvious leap, but a scan of the fridge revealed the makings for taquitos. I've never actually made taquitos before. They are typically fried (not one of my favored preparation methods), but thought I could get the desired crispiness in a hot oven. It worked. Here's what I did:

Baked Taquitos
Serves 2

olive oil
1/2 c. yellow onion, chopped
a handful of white mushrooms, chopped
6 oz. chicken breast, cooked and chopped (you could substitute veggie ground to keep this recipe meatless)
1 tsp. cumin
1/2 tsp. oregano
6-8 small corn tortillas
1/2 c. grated cheese

Cook the onions in olive oil in a skillet over medium heat until translucent, about 5 minutes. Add the mushrooms and continue to cook about 2 minutes. Add the chicken and spices, stirring to coat. 

Warm tortillas until soft and very pliable (this can be done one at a time in a hot skillet, or in the microwave). Spoon filling onto the first tortilla. Sprinkle with cheese. Roll tightly and place in a foil-lined baking dish. Repeat with remaining tortillas. 

Bake in 400 degree oven 20 minutes, or until edges begin to brown and taquitos are crispy.

We dipped ours in sour cream and salsa. For a complete Cole's Kitch meal, you could dip the taquitos in salsa verde and serve with a bowl of tortilla soup.

Sunday, April 5, 2009

cauliflower curry


I've been thinking about cauliflower curry for a couple of days (but Thai takeout and dinner with friends last night jumped ahead in line). Tonight's recipe started with one I found online (as they often do) on a blog called Oven Love. I made a few changes: omitted the potatoes (due to the large size of my cauliflower), added freshly grated ginger, coconut milk, and some cayenne pepper for a little spice. Here's how it went:


Cauliflower Curry
Serves 4-6

olive oil
1 onion, chopped
2 cloves garlic, minced
2 Tbsp. curry powder
1/2 tsp. sea salt
1/2 tsp. ground cayenne pepper
1/2 tsp. fresh ginger, grated
3 cups veggie stock
6 oz. tomato paste
1 cup dried lentils
1 head of cauliflower, cut into florets
1 cup coconut milk (not lite)

Heat about 1 Tbsp. olive oil in a pot over medium heat. Add onion and garlic and cook until soft, about 5 minutes. Add spices (including ginger) and stir and cook 2 minutes. Add tomato paste, lentils, and cauliflower. Stir, increase heat, and bring to a boil. Cover, reduce heat, and allow to simmer 10 minutes.

Stir in coconut milk. Recover and continue to cook for 20-30 minutes, until cauliflower is tender. Serve over rice. 

We had ours over red rice, garnished with fresh kale from the garden.


Cauliflower Curry on Foodista


Saturday, April 4, 2009

easy weeknight pasta


As I was driving home from work on Thursday evening, I was mentally going through the items in my fridge and pantry to figure out what we could eat for dinner. Normally, I outline the week's meals over the prior weekend (which I generally find necessary to ensure we eat all of the produce from 2 weekly CSA deliveries without letting any of the food spoil or go to waste). But last weekend my mother was in town (fun, but busy) and this week has been crazy with work, so I'm figuring out weeknight meals as I go.

Criteria for this particular night: 1) something fast (it was already 8pm as I was commuting the 20-some miles from work to home) and 2) something healthy. Here's what I did:

Easy Weeknight Pasta
Serves 2

6 oz. angel hair pasta
olive oil
1 small onion, chopped
2 cloves garlic, minced
leaves from 3 sprigs fresh oregano, chopped
a handful of mushrooms, sliced
about 15 kalamata olives, pits removed and sliced
1 bunch greens, roughly chopped*
1 15 oz. can chopped tomatoes
balsamic vinegar
crumbled feta
*I used swiss chard, stems removed. Collard greens or spinach would also be good.

Heat a pot of water for the pasta. While water is warming, heat 1-2 Tbsp. olive oil in a large saucepan over medium heat. Add onion and garlic and cook until soft, about 5 minutes. Add oregano and mushrooms and continue to cook until mushrooms are soft, stirring occasionally. Add olives and chopped greens. Cook, stirring occasionally, until greens start to become tender and bright green. Add tomatoes (juice and all) and 1-2 Tbsp. balsamic vinegar. By this time, your pasta water should be boiling - add the pasta. Continue to cook the veggies, stirring occasionally, until pasta is done.

Drain pasta and divide between bowls. Top with veggie mixture and sprinkle with crumbled feta. 

This might be a record in our house for a speedy, healthy dinner - JR helped with the chopping, which meant that from the time I pulled the onion out of the pantry to the time we sat down with hot bowls of food was only about 15 minutes. 

Depending on your desired veggie/pasta ratio, you may end up with leftover veggies (we did). I used the remaining veggies for brunch this morning by mixing them into scrambled eggs. Yum!

Wednesday, April 1, 2009

eggless chocolate chocolate cookies

Though they are eggless, these cookies are not vegan. I actually didn't even set out to make eggless cookies, but did so out of necessity when I realized there were no eggs in the house and was too lazy to walk the quarter of a mile to the grocery to pick some up. I'm glad I didn't. These cookies turned out amazing (if I do say so myself!). 


When I decided that I wanted to make cookies, I knew I wanted chocolate. When I realized I had no eggs, I did a quick scan of the fridge and pantry to see what else I might be able to throw in. The usual substitute would be mayonnaise (which is generally made of mostly eggs), however my eggless Vegannaise was not going to cut it. While I was checking on the mayo situation, I did notice that we had sour cream. I've had sour cream cake before, but never cookies. The chocolate sour cream combination sounded like something worth trying.

An internet search left me dissatisfied. Finding eggless cookie recipes was one thing. But eggless plus chocolate plus sour cream? There were a few, but none sounded real great (one called for two cups of confectioner's sugar! talk about sweet!). So I decided to experiment. This might possibly be my best experiment to date. Here's what I did:

Eggless Chocolate Chocolate Cookies
Makes about 3 dozen

2/3 c. butter, at room temperature*
1/2 c. brown sugar
1/2 c. white sugar
3 Tbsp. sour cream
1 tsp. vanilla
1 1/4 c. whole wheat flour**
3 Tbsp. baking cocoa***
1/2 tsp. baking powder
1/4 tsp. baking soda
1/2 c. bittersweet chocolate chips***

*Or nuked very briefly in the microwave if you're a poor planner like me.
**The slightly rougher texture (compared to refined flour) was perfect for this cookie.
***Don't skimp on the chocolate - use high quality for a tasty cookie. I used Green & Black's organic cocoa powder and Ghirardelli 60% cacao bittersweet large chocolate chips.

Cream together the butter and sugars. Mix in sour cream and vanilla. In a separate bowl, stir together dry ingredients (including chocolate chips). Add them to the wet and mix well.

Drop by small, rounded spoonfuls onto a parchment paper lined baking sheet. Bake 10 minutes at 350 degrees.


Try not to eat them all in one sitting! (Though they're small, so you can eat quite a few and not feel too guilty!)

Blog Widget by LinkWithin

Popular Posts