Saturday, February 28, 2009

roasted romanesco

My first time adventures cooking new-to-my-kitch veggies starting with the letter 'r' continues tonight with romanesco. Romanesco is a variant of cauliflower, first documented in Italy in the sixteenth century. I initially encountered romanesco when it started making appearances in the Google cafe. When it was listed as a featured item this week on EWTS, I decided I had to try cooking it myself.

It also just struck me that in addition to starting with 'r', all of the veggies I've been cooking this week have been really pretty. Aesthetically, romanesco does not disappoint. Like many things in nature, romanesco grows in a fractal pattern (which the math geek in me loves), exhibiting self-similarity on multiple scales such that it can be split into parts, each of which is a smaller copy of the whole. Fractal food!

Roasted Romanesco

1 head romanesco, broken into florets
2 Tbsp. olive oil
1/2 tsp. sea salt
1/2 tsp. crushed red pepper
1/2 tsp. freshly ground black pepper

Add ingredients to a bowl and toss to cover. Bake in a 400 degree oven 45 minutes, until undersides are golden and caramelized. (We had rutabaga left over from earlier in the week, so I tossed that in as well.)

Fractal delish!

Friday, February 27, 2009

sauteed radicchio

This wasn't planned, but it turns out that this week is filled with my first time cooking a number of veggies that all begin with the letter 'r'. It all started with the rutabaga on Tuesday. Tonight, it's radicchio. (Coming soon: romanesco!)

Radicchio is often found in the bags of salad greens that are found at the grocery store. But I'd never seen one whole. The one that came in the CSA box might be the most beautiful radicchio there ever was. Or maybe they're all this photogenic?


Surely anything such a brilliant shade of purple must be packed with nutrients, right? A quick look through The Complete Guide to Nutritional Health informed me that radicchio contains vitamins B2 and B3, potassium and fiber. Apparently, eating radicchio helps the body maximize energy release from food, prevents cholesterol buildup and the formation of blood clots. The book also lists radicchio as having "bitter principles". A quick taste confirms that yes, it does have a bitter taste that is stronger than most other leafy vegetables. Let's see if it stays that way once cooked. Here's what I did:

Sauteed Radicchio
Serves 2

1 head radicchio
1 Tbsp. red wine vinegar
1 clove garlic, minced
1/4 tsp. sea salt
1/4 tsp. black pepper
2 oil packed anchovy fillets, chopped
3 Tbsp. olive oil
4 sprigs fresh oregano

Cut the radicchio in half, then cut each half into 4 wedges. In a small bowl, whisk vinegar, garlic, salt pepper, anchovies, and 2 Tbsp. olive oil. Set aside.

Heat remaining oil in large skillet over medium heat. Add radicchio in a single later and cook for 3 minutes. Turn, add vinaigrette and oregano. Cook until tender and slightly browned (about 3 minutes). Serve at room temperature.

The verdict? Some of the bitterness prevails through cooking, but the salty anchovies and sweet oregano provided a nice balance to this dish. And it was really pretty!

Tuesday, February 24, 2009

rutabaga 3 ways

Nobody knows what a rutabaga is. Nobody in my house, at least.

When it showed up on the list of veggies to choose from in Eating with the Seasons, I decided to be adventurous. I don't think I've ever eaten a rutabaga before, and I certainly have never cooked one.

In my mind, I pictured rutabagas looking something like sweet potatoes. I was surprised when the veggies showed up to pull seven small purple and cream orbs from the produce bag. They were beautiful!

I ran a test with both JR and Marika (independently) to see if either could identify the object as a rutabaga. Turnips and jicama were their guesses, respectively. Nobody knows what a rutabaga is. But they will after tonight!

It turns out a rutabaga is a root vegetable, but is more similar to a turnip than a potato (in fact rutabagas are sometimes called "swedish turnips" and in much of the rest of the world, what we know as a rutabaga is actually what they call a turnip). They grow well in cold climates and are popular in Scandinavia, especially Sweden (they are sometimes also called "swedes"). Apparently, during World War I, the vegetable developed a bad rap in Europe: after grain and potato crop failures (plus war), large parts of the population were kept alive on rutabagas and little else. Because of this, the rutabaga developed the reputation of famine food and is rarely planted in some parts of Europe (like Germany).

What's nutritive about a rutabaga? I Googled it. They are rich in beta carotene and a good source of vitamin c, folic acid, and fiber.

How do you eat a rutabaga? Google again. What I found suggested that rutabagas are extremely versatile - they can be eaten raw, roasted, mashed. But having never eaten a rutabaga (at least not knowingly), which way would taste best? I decided that in order to answer that question, I'd have to try all three. Here's what I did:

Rutabaga Raw: Peel the rutabaga and cut into sticks. We ate it dipped in hummus. I think raw rutabaga has a texture similar to jicama and a taste similar to a turnip or radish. I later read that raw rutabaga is sometimes grated and made into slaws along with carrots and cabbage, which would probably be tasty. Alone the flavor was a little strong for me.

Rutabaga Mashed: Peel the rutabaga. Cut it into cubes and add to boiling water. Boil about 20 minutes, or until soft. Mash together with butter, milk or cream, and a pinch of black pepper. (Online sources suggested that this can also be made together with carrots - cut them into 1-inch pieces and add to the boiling water at the same time as the rutabaga.)


Rutabaga Roasted: Peel the rutabaga. Cut into chunks. Mix with olive oil, a spoonful of brown sugar, and a pinch of sea salt. Roast in a baking dish in a 400 degree oven for 30 minutes or until soft and caramelized. Again, carrots are a good addition here. (We only had a couple of carrots in the fridge and I love roasted carrots, so I put them all into this dish rather than try any in the mashed version.)

The vote on best preparation across JR, Marika, and myself was unanimous: roasted. In m opinion, the raw rutabaga was a little too astringent, the mashed a little bland, and the roasted were just right. Whereas boiling sucks flavor out of vegetables, roasting allows them to express a richer, sweeter flavor. And rich, sweet rutabagas, we found, are very tasty indeed!

Sunday, February 22, 2009

split pea soup


It's winter. It's raining. It's time for some split pea soup. As so often is the case, 101 cookbooks had exactly what I was looking for. I followed the recipe exactly and so am not even going to bother reposting! You can find the original post here. It was fantastic - JR and I both went back for seconds!


Saturday, February 21, 2009

orange tofu & peanut kale

Ah, weekend. Today was a fantastic day - the perfect combination of lazy and productive. I woke up late (lazy). We took the pup to the dogpark (productive). I thought about going for a run, but then didn't (lazy). JR and I went to Common Ground in Palo Alto and got equipment for my soon-to-be container garden (productive). I decided I'd wait until tomorrow to do the actual planting (lazy). I started playing in the kitchen at 6pm (productive).

What's on the menu tonight? Orange tofu and peanut kale, served over red jasmine rice. Yum!


Orange Tofu
Serves 4

12 oz. firm tofu
1 c. orange juice (I juiced blood oranges from the CSA)
1/3 c. tamari
1/4 c. rice vinegar
1/4 c. olive oil
3 tsp. sesame oil
1/2 tsp. chili paste
3 garlic cloves, minced
1 Tbsp. fresh ginger, minced
2 green onions
1/4 c. fresh cilantro, chopped

Place the tofu block on its side and slice into 4 pieces (they will be thin). Turn the block so it's resting on the largest side. Cut an 'x' across the block, so that you are left with 16 triangles. Keeping the block together, set the tofu on a plate, covering with a paper towel and heavy skillet. Allow to sit this way for 30 minutes to press out excess water.

Meanwhile, make marinade by whisking together the remaining items (except green onions and cilantro).

Arrange the tofu in a single layer in a baking dish. Pour marinade over tofu. Top with green onions and cilantro. Allow tofu to marinate for at least 30 minutes.

Bake tofu in 350 degree oven about 1 hour, until it is golden and most of the marinade is absorbed.


Peanut Kale
Serves 2

For sauce:
Note - this will yield about twice as much sauce as needed for the kale. You can either cut the following quantities in half, or have leftover sauce for another meal (it will keep in the fridge for up to a week).
1/2 c. peanut butter
1/3 c. lite coconut milk
3 Tbsp. tamari
2 Tbsp. fresh lime juice
2 Tbsp. agave nectar
1 Tbsp. toasted sesame oil
1 Tbsp. fresh ginger, peeled & sliced
2 garlic cloves, sliced
1/4 c. cilantro
1/2 tsp. red pepper flakes
sea salt

olive oil
1 bunch kale, stems removed & chopped
1 handful of peanuts, chopped

For sauce: add all ingredients to food processor. Process until smooth.

Heat oil in a wok or skillet over medium heat. Add kale, stir and cook for 2-3 minutes, until dark green. Add peanut sauce and cook until heated through. Top with chopped peanuts.

spicy bok choy soup

The following recipe was made using the homemade veggie stock that I posted on Wednesday. My stock this time included leeks (in place of onion), carrots, celery, kale stems, and spinach.

Once you've got the stock on hand (either homemade or store bought), this is a simple and flavorful recipe. Enjoy!


Spicy Bok Choy Soup
Serves 4

olive oil
1 yellow onion, chopped
8 oz. firm tofu, minced
5 c. veggie stock
1 Tbsp. tamari
1 tsp. chili paste
bok choy, chopped, with ribs separated from leaves
handful of rice noodles (optional)
toasted sesame oil

Heat olive oil in a heavy pot over medium heat. Add onion and tofu. Cook, stirring frequently for 10-15 minutes, until mixture begins to brown. Add vegetable stock, tamari, chili paste, and bok choy ribs. Simmer for 5 minutes. Add bok choy leaves and rice noodles. Simmer an additional 5 minutes, or until noodles are soft. Ladle into bowls, finishing with a drizzle of toasted sesame oil.

Thursday, February 19, 2009

homemade veggie stock

I just returned from a fantastic talk by Joel Salatin (Polyface, Inc.) at Stanford (thanks, Steph for the invitation!). I'm even more inspired now to start my container garden this spring. More on the talk and my city farming plans will follow soon!

Yes, I've even started making my own veggie stock.

I can almost see you rolling your eyes at your screen. Why? Two primary reasons: 
1. It's not that hard.
2. It's a good way to use scraps or leftover vegetables from the 2 CSA's that we're currently receiving weekly produce from. That amounts to a lot of veggies! This way I don't ever have the sad task of throwing any of them away.

Homemade vegetable stock is beautifully imprecise. There are no hard prescribed quantities. If you have more or less of a particular vegetable, that's ok - add what you have to the pot. In fact, you can throw in pretty much any veggie you want. It tastes a little different each time. Your home will smell wonderful as it cooks. It's a world different from what you'll buy in the store.

That's not to say that I don't buy stock from the grocery store. I do. No one has time to make it from scratch every time, right? But I promise that if you find the time to do so (even just once), you will not be disappointed!

Here's the basic recipe:

Basic Vegetable Stock
makes about 8 cups

2 Tbsp. olive oil
1 large onion, chopped
5ish ribs of celery, chopped
3ish carrots, chopped (no need to peel)
4ish cloves of garlic, sliced
1 bay leaf*
1 tsp. whole pepper corns
1 tsp. salt
10 c. water
1/4 c. tamari

Heat the olive oil in a large pot over medium heat. Start chopping the veggies in the order listed above, adding them to the pot as you go, stirring occasionally. Once all of the veggies are in the pot, add the spices and water. Cover and increase heat until it starts to boil. Reduce heat and allow to simmer for 1 hour.

Add tamari. Let broth simmer uncovered for 3o minutes so flavors can continue to meld. Strain the veggies out. You'll be left with a super tasty stock that can be used immediately, kept in the fridge for about a week, or frozen (in an ice tray is a convenient way to do it if you don't want it to turn into a single frozen block).
  
You can literally throw in (just about) any veggie. If you enjoy the flavor of it whole, chances are you'll like it in the stock as well. Here are some not listed above that I've tried: leeks, spinach, kale, kale stems, potatoes, turnips, cabbage, broccoli, cauliflower, bok choy. You can also add fresh herbs: parsley, rosemary, thyme, and so on.

I find myself making stock this way about once every other week, then keeping it in the fridge and using it throughout the week. If you have leftover stock, consider using it in place of water for cooking grains (rice, couscous, quinoa). 

Experiment and enjoy!

*Don't make the same mistake I did when first looking for a bay leaf about a year ago. You won't find it in the produce section of the grocery store, but rather with the spices. Yes, I actually had to ask a fellow shopper and then try to hide my embarrassment! I used to avoid recipes that called for bay leaves because I thought that meant they were too difficult. Ah, what a difference this past year has made!

Wednesday, February 18, 2009

garlicky kale


I'm going to give the squash a rest today and post about one of my other favorite vegetables - kale (want more on kale? click here). This is perhaps the easiest kale recipe in existence. 

Garlicky Kale
Serves 2

1 Tbsp. olive oil
1 bunch curly kale, stems removed and chopped
3 cloves garlic, minced
2-3 Tbsp. balsamic vinegar

Heat the olive oil in a large pot over medium heat. Add the kale and cover. Stir occasionally until the volume of the kale is reduced by half. Uncover. Add garlic and balsamic. Allow to cook for about another 30 seconds or so, mixing well so that the garlic and vinegar are well distributed. Serve hot.

So simple. So tasty. Do you love it?
Garlicky Kale on Foodista

Monday, February 16, 2009

...and more squash


Yes, my squash obsession is still going strong. I've been thinking about this recipe since I made the aztec squash soup last week. Repeat after me: butternut squash mac & cheese. It sounds strange. It's amazing.

Butternut Squash Mac & Cheese
Makes about 6 servings

olive oil
1 medium butternut squash
12 oz. macaroni noodles*
1 small onion, chopped
1 tsp. nutmeg
1/2 tsp. white pepper
1 Tbsp. flour*
1 cup milk
12 oz. sharp cheddar, grated

Roast the butternut squash: cut in half, seed, rub cut side with olive oil, and place, cut side down in a baking dish. Bake in 400 degree oven for 60-75 minutes, or until soft. Once cool enough to handle, scoop the flesh out into a large bowl. Mash the squash with the backside of a spoon.

Reduce oven temperature to 350 degrees. Cook macaroni on stovetop according to package. Rinse with cool water. Set aside.

Heat 1 Tbsp. olive oil over medium heat. Add onion and cook for about 2 minutes. Add spices and continue to cook, stirring occasionally until the onion is translucent. Add flour and mix well. Stir in milk slowly. Increase heat and continue to stir until sauce begins to boil. Reduce heat and continue stirring, allowing sauce to thicken. Add cheese and continue to stir until cheese is mixed in and fully melted.

Add sauce and noodles to bowl with squash. Mix well. Transfer to a baking dish and bake 30 minutes. This makes a pretty sizable dish. Nate and JR and I ate it last night. Marika and I will be eating the leftovers tonight (a cheesy dish to accompany our cheesy Bachelor viewing).

*I made our mac & cheese gluten free by using rice noodles and brown rice flour. Also we don't generally keep milk in the house, so I used soy milk. It still turned out great. You can also make the recipe vegan by substituting soy milk for the milk and in place of sharp cheddar, use 8 oz. vegan cheddar, 2 oz. vegan jack cheese and 1/2 cup vegan cream cheese.

Let me know what you think!

squash, squash, squash

I'm obsessed with squash right now. It came on suddenly, starting with the butternut squash that came from Eating With the Seasons last week. Then came the kabocha squash from FFTY. What is kabocha squash? I asked myself the same question. Of course Google had the answer.

Kabocha squash is also known as Japanese pumpkin. It is slightly sweeter than butternut squash and similar in texture and taste to a cross between pumpkin and sweet potato. What do you do with it? I had no idea. A quick search online brought up a fantastic sounding recipe - sweet & spicy roasted kabocha squash. It was originally posted in 2007 on a Japanese recipe blog,  www.justhungry.com. I modified it slightly based on ingredients I had on hand. It was fantastic.

Sweet & Spicy Roasted Kabocha Squash

1 kabocha squash
3 Tbsp. muscovado sugar (plus more for sprinkling)
1/2 tsp. cayenne pepper
1/2 tsp. cumin
1/4 tsp. cinnamon
1/4 tsp. nutmet
1/4 tsp. sea salt
1 Tbsp. tamari
walnut oil for drizzling*

Heat oven to 400 degrees. Deseed squash. Cut into slices about 1/4 inch thick (leaving skin on). Combine dry ingredients. Toss squash and spice mix in a large bowl until squash is well coated. Add tamari and toss well again.


Spread slices in a single layer on baking sheet lined with parchment paper. Drizzle with oil and sprinkle with additional sugar. Bake 15 minutes. Remove from oven and flip over each piece. Drizzle the second side with oil and sprinkle with sugar. Bake an additional 10 minutes.

Nate and JR returned from day #3 of following the Tour of California, happy despite the continuing rain. They rode a bit of the course today and took some great photos (including the one to the right - Lance is riding third). They gobbled up the squash. JR said it was awesome. Nate liked the surprise spiciness. I did notice at the grocery store earlier today that they had kabocha squash. I definitely recommend this recipe.

*The original recipe called for pumpkin seed oil, which I was unable to find. I used walnut oil instead, which worked well.

Sunday, February 15, 2009

sesame veggie stir fry


It's a grey, rainy day in San Francisco. We need the rain to avoid another drought year and to put off the impending threat of water rationing. And while I won't say that I miss the precipitation (got plenty of it growing up in Seattle), I know that sunshine can't be far behind (unlike the scenario in February in the Northwest, when the warm sun is generally still months away), so I'm not really bothered by it. 

Also it creates a good excuse for lounging by the fireplace and doing indoor things. While the boys are out braving the weather in hopes of a glimpse (or even better, a photo) of Lance at stage one of the Tour of California, I'm toasty in my living room.

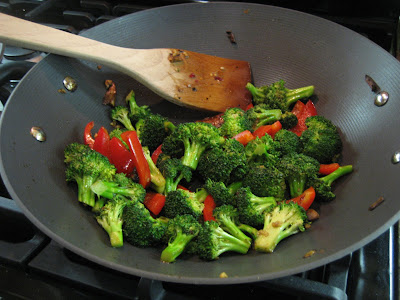
Today's recipe is one that's been sitting in my 'to post' pile for a while. If you don't often cook asian dishes, you may need to stock up on some sauce making staples (sesame oil, mirin, tamari, rice vinegar). Once you have those on hand, you'll have the ability to create a tasty sauce for stir fries or dipping at your convenience.

Sesame Veggie Stir Fry

1 Tbsp. refined coconut oil*
2-3 heads of broccoli, cut into bite size pieces
1 red pepper, cut into strips
1 handful of mushrooms, sliced

For Sauce:
1 clove of garlic, minced
2 Tbsp. apricot sauce or preserves
2 Tbsp. tamari
1 Tbsp. toasted sesame oil
2 tsp. rice vinegar
1 tsp. mirin
1/2 tsp. chili paste
sesame seeds

Mix all sauce ingredients in a small bowl. Set aside.

Heat coconut oil in a wok or large skillet over medium-high heat. Once the oil is hot, add the broccoli and red pepper. Stir fry for 2-3 minutes. Add mushrooms and continue to stir fry until vegetables are crisp-tender. Add the sauce and continue to stir fry until the sauce is mixed in and heated through. Sprinkle with sesame seeds.

We ate our veggie stir fry with seared ahi tuna. It would also be good over sticky rice (perhaps with some tofu or other protein mixed in).

*Why refined coconut oil? Coconut oil is a plant-based saturated fat that remains stable at the med-high heat typically used for stir fries (heating most oils at high temperatures changes their molecular structures, causing free radicals, which are linked to a host of health issues, like heart disease and cancer; yes, this includes olive oil). Because of its neutral taste, coconut oil is also good for baking. Coconut oil is becoming easier to find as the myths surrounding saturated fats are debunked, but you may have to go to a specialty or health store to find it. New research shows there may be health benefits of having a diet that includes coconut oil.

Thursday, February 12, 2009

aztec squash soup


Can you believe that the first time a full butternut squash entered my kitchen was only a couple of months ago? (I say "full", because they've been here in pieces before - most commonly in the filling of store bought ravioli.) I had no idea how easy it is to roast a butternut squash. But I've learned! It's one of the many things California has taught me, I guess you could say.

Today's featured recipe is Aztec Squash Soup, which I made last night (we'll be enjoying the leftovers tonight). Because the squash takes some time to roast, I did that part the night before, storing the squash in the fridge until it's use last night. I hope you like the soup as much as we do!

Aztec Squash Soup
makes a big pot of soup

olive oil
1 (1-1.5 pound) butternut squash
1 large yellow onion, chopped
2 garlic cloves, minced
5 celery stalks, chopped
6 cups vegetable broth
1 tsp. cumin
1 can black beans, rinsed well
1 cup frozen corn kernels
1 red bell pepper, chopped
1/4 cilantro, chopped
avocado (optional, but recommended!)

Preheat oven to 400F. Halve the butternut squash lengthwise and scoop out the seeds. Rub olive oil on the cut sides. Place the squash halves, cut side down, on the baking dish (be sure to use a dish, not a baking sheet - I made this mistake the first time I roasted a squash and ended up with squash juice all over the oven). Roast squash until tender, 60-75 minutes. Once cool enough to handle, scoop squash out into a medium bowl.

Heat olive oil in a heavy large pot over medium heat. Add onion and garlic, sauteing until golden (about 10 minutes). Mix in celery and 1 cup broth. Cover and allow to simmer for 10 minutes, stirring occasionally. Add squash, 5 cups broth, and cumin. Cover and simmer 20 minutes to blend flavors.

Using an immersion blender, puree squash soup until smooth (if you don't have an immersion blender, you can do this in batches in an upright blender). In pot, thin soup to desired consistency with additional vegetable broth. Mix in black beans, corn, red pepper, and cilantro. Cover and simmer 10 minutes.

Season to taste with salt and pepper. I served our soup with sliced avocado and a handful of blue corn chips. This is one of those dishes that tastes even better the second (or third) day when the flavors have had more time to meld.

Roasted Butternut Squash Soup on Foodista

Tuesday, February 10, 2009

a little fish

No, I'm not a vegetarian. Yes, I've been posting for nearly 2 months and this is the first time you've seen a "meat" recipe from me (assuming you count fish as meat - for the record, I do). 

Currently, I don't eat a lot of meat. I say currently because there have been periods in my life of vastly varying meat consumption (from the vegan experiment - more on that later, to a period of time in Texas where meals without some sort of pulled meat are nearly unheard of).

So while the majority of my meals (and thus, the recipes on this site) are plant-based, every once in awhile there will be some animal protein on the menu. Tonight is one of those nights.

Seared ahi is the easiest fish recipe I'm aware of. Because the ingredients are few and simple, it's important that they be of high quality (especially the tuna).

Seared Ahi Tuna

olive oil
2 small ahi tuna steaks
sesame seeds

Heat the olive oil in a skillet over medium high heat until hot (but not smoking). Spread sesame seeds on a shallow plate (I use both black and white because I like how it looks). Set the ahi onto the plate of sesame seeds, pressing lightly so the seeds will stick. Flip over to coat the second side.

Once the oil is hot, add the tuna to the skillet. Watch carefully to cook desired amount - you should be able to see the fish start to cook from the bottom up. Flip and sear other side. Viola!

We paired ours with a sesame veggie stir fry.

Monday, February 9, 2009

strawberry spinach salad

No, the strawberries at the grocery store don't look very good this time of year. That's because in most cases, they've been on a truck and travelled great distances to get here. Why? Because it's not berry season in California. A quick Google search shows that it is currently strawberry season in Florida. That's a bit of a truck ride, I'd say.

Thank goodness for the overflowing farmers markets in the summer. I can't really say that I thought ahead to winter when there wouldn't be fresh, local berries. Rather, I was wooed by the gorgeous blue, red, and purple berries and most of the time brought home far more than we could eat. Nearly every week during the summer, half of the berries that came into our house were consumed and the other half made their way into the freezer.

Which means that after a night in the fridge, I have some fresh berries ready for consumption! Here's how they were most recently put to use:

Strawberry Vinaigrette

1/2 c. strawberries, stems removed (if frozen, allow to thaw)
3 Tbsp. red wine vinegar
1 Tbsp. basalmic vinegar
1 Tbsp. olive oil (or more)
freshly ground black pepper

Blend in a food processor until smooth.

Our salad consisted of this dressing mixed in with spinach, walnuts, dried golden figs, and sliced apples.

Sunday, February 8, 2009

crockpot beans to cry for

It is morning as I begin to write this. As with many Sunday mornings of late, I find myself online perusing recipes and in the kitchen chopping ingredients in preparation for the evening's meal. 

This morning the chopping brought me to tears. Literally. 

No, it wasn't at anything crazy, but rather a fairly usual suspect when it comes to kitchen crying - an onion. What was strange is that I don't think I've ever gotten teary eyed from an onion before. 

Why do people cry at onions, anyway? I googled it. It turns out that when you chop an onion, it breaks the onion cells, releasing into the air an enzyme that reacts with the eye (interestingly, it's the same enzyme that makes them so tasty!). Normally, I shield myself from these enzymes with my contacts. But this morning, I stood in my kitchen, wearing glasses and chopping while tears streamed down my face.

So, it is in the honor of the onion that I name tonight's side dish:

Crockpot Beans to Cry For
Serves 6-8

If you thought far enough ahead to start soaking the beans over night, you can jump right into the put-it-all-in-the-crockpot step. But if you're a late planner like me, follow the shortcut described below.

1 lb. dried kidney beans, rinsed and sorted
2 apples, cored and diced (no need to peel)
1 large onion, chopped
3 cloves garlic, minced
1/3 c. molasses
1/4 c. brown sugar
1 Tbsp. brown mustard
1/4 tsp. ground red pepper
1 tsp. salt

In a large pot, cover beans with water. Bring to a slow simmer. Cover and cook for about 40 minutes, until beans just start to soften. Drain.

Add beans and other ingredients to crockpot. Add enough water to cover the beans. Cover and cook on low until the beans are very soft, about 8 hours. Check periodically and add more water if needed to keep the beans from drying out.

A couple of notes: 
  1. This recipe makes quite a lot. I'll be freezing half of it (possibly more) for consumption at a later date.
  2. In response to JR's complaints of late that he wants spicier food, at the put-it-all-in-the-crockpot step, I also added some hot pepper sauce. More can be added later in the cooking process per your taste, if you really want to spice things up.
Tonight, the beans will serve as a side dish for our California veggie burgers. If I close my eyes, I can pretend I'm enjoying it at a BBQ at the beach... but the satisfaction is fleeting - I open my eyes to find it's still winter and I'm still wearing wool. 

Let me know what you think!

Saturday, February 7, 2009

1 pot coconut curry


"Something curry" was the request from JR for what he wanted to eat for dinner last night (ok, really it was two nights ago, but his initial request was bumped in favor of Rustic Cabbage Soup). So I took a quick scan of the fridge and pantry last night and decided that I could pull a curry dish off, and try out a new combination of ingredients all at the same time. Here's what I did:

1 Pot Coconut Curry
Serves 4

1 c. lentils, rinsed and sorted
4 c. vegetable stock
1 medium yellow onion, chopped
2 cloves garlic, minced
2 Tbsp. curry powder
1 tsp. turmeric
1 tsp. cumin
pinch of salt
1 c. coconut milk (regular, not light)
1 bunch dino kale, chopped
12 oz. firm tofu, chopped

Cook the onions and garlic in olive oil in a large pot over medium heat until they begin to brown. Add the lentils and stock, bring to a boil. Cover and reduce heat. Allow to simmer for 20 minutes, stirring occasionally.

Add spices and coconut milk to pot, stir well. Cover and continue to simmer for about 25 minutes, stirring occasionally.

Add chopped kale to the pot. Don't mix it in, but rather let it sit on top of the lentils and cover the pot to allow the kale to steam for 5 minutes. Add the tofu to the pot. Mix well and continue to cook until heated through.

I served the curry over purple jasmine rice, which was a really pretty color combination.

Note: JR thought it could use a little more spice (though to put it into perspective, it's only when his nose starts to sweat that he thinks it's the "right" amount of spice). The curry powder I currently have on hand is mild. Next time, I may try mixing it up with a spicier blend. Let me know what you think!

what to do with a head of cabbage

This week's CSA box included a head of green cabbage. It actually stressed me out a little. The cabbage recipes I could online find were almost exclusively of the slaw/chinese chicken salad variety, neither of which sound appealing to me in the middle of winter (yes, it's even raining in California). Luckly, as it often does, 101 cookbooks saved the day.

Heidi Swanson seems to have a sixth sense for cooking. I'm always amazed to find that in many cases, the perfect recipe I find on her site was posted only days earlier. It's like she knows what's going to come out of my kitchen before I do! In this particular instance, the recipe was Rustic Cabbage Soup. 

I admit it: cabbage soup is not something that sounds like it's going to be very tasty (but rather like something that would be served in a Dickens novel), however I will personally vouch for this one. JR went back for seconds. 

Check out the Rustic Cabbage Soup Recipe at 101 cookbooks. Enjoy!


Wednesday, February 4, 2009

mexican dinner frittata

This week's CSA box might be my favorite combination of things so far: green cabbage, collard greens, kiwi, clementines, dino kale, yukon potatoes, garlic, and onions. This produce all has a lot of potential. So much so, that I wasn't exactly sure what I wanted to make (or eat) most...


...so I let a beauty contest determine with what we'd feed our hunger this evening! Though the skinny dino kale might have beat the collard greens in a swimsuit competition, the collard greens won me over with their bright green stalks (and obvious sunny personality). I decided they'd take home the crown tonight. Runners up onion and clementines will get to join in on the fun. Hopefully the rest of the veggies won't be too jealous.

I've actually been thinking about this dish for a couple of days. One of my early blogs was on my love of leafy greens-egg-cheese combos. Tonight's version will be a south-of-the-border twist. It goes like this:

Mexican Dinner Frittata
Serves 4 (or 2 with leftovers)

3 Tbsp. olive oil
1 small yellow onion, chopped
1/2 red bell pepper, chopped
1 bunch collard greens, stems removed and chopped
1 15 oz. can black beans, rinsed and drained
6 eggs
1/2 tsp. cumin
1/4 c. cilantro, chopped (plus more for garnish)
1 cup corn chips, crushed
1/2 c. salsa
1 c. sharp cheddar cheese, grated

Heat 2 Tbsp. olive oil in a large pan. Add onions and cook for 2 minutes. Add pepper and continue to cook, stirring occasionally, until onions begin to brown. Add collard greens and cook, continuing to stir occasionally, until bright green. Meanwhile, whisk 6 eggs in a large bowl. Add black beans, cumin, and cilantro. Once the greens are done cooking, add them to the egg mixture and stir well (the eggs may start to cook from the heat of the greens - that's ok).

Turn on the broiler to high. On the stovetop, heat 1 Tbsp. olive oil over med-high heat in an 8-inch skillet. Once the oil is hot, add crushed chips, evenly coating the bottom of the skillet. Pour the egg mixture into the skillet and reduce the heat to med-low. After about 2 minutes, go around the edge of the skillet with a spatula, slicing the egg mixture away from the pan (so that the finished product isn't cemented to the pan).

Cook for about 5 minutes longer, until the eggs look mostly set (and no longer runny on top). Spoon salsa and then sprinkle cheese over the top of the eggs. Transfer to the oven to finish cooking under the broiler about 5 minutes, or until cheese begins to brown.

Remove from oven. Let sit for 5 minutes. Cut and serve topped with sour cream and sliced avocado.


We had ours this evening with a side of clementine oranges. And we'll have some tasty leftovers for breakfast! Correction: I will have some tasty leftovers tomorrow. JR liked it so much that he already ate two servings!

Monday, February 2, 2009

eggplant marinara

No, eggplant is not currently in season in California. But I'm out of veggies from last week's CSA box and a walk past the shiny purple plants at the grocery store (plus the fact that it's been months since I've had one) was more than I could pass up today. Pair it with some marinara and cheese for a super tasty (and easy to make) main dish. Here's what I did:

Eggplant Marinara

olive oil
1 medium eggplant, sliced about 1/2 inch thick
2 c. marinara sauce
8 oz. mozzarella, grated
1/4 c. parmesan, grated

Pan fry eggplant in olive oil over medium heat until tender, 2-3 minutes per side. Depending on the size of the pan (and the eggplant), you'll probably have to do this in a couple of batches.

Cover the bottom of a baking dish with marinara sauce (I'll post a recipe soon - for tonight's weeknight version, I used pre-made). Layer eggplant, sauce, and mozzarella, finishing with the remaining mozzarella and parmesan.

Bake in a 375 degree oven for 20 minutes. Broil for 2 minutes or until the top begins to brown.


Tonight, I paired the eggplant with a spinach salad. It probably should have been enough for 3-4 servings, but it tasted so good that we ate every bit of it! Hopefully that will hold us over a few months until we can get some fresh eggplant from the local farmers market!

Sunday, February 1, 2009

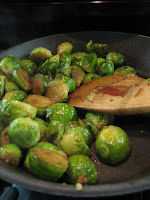
spicy, salty, sweet brussels sprouts

JR hates Brussels sprouts. He holds his hand over his face and jokes that he's going to leave the house if I bring them home when I even take a step toward them at the grocery store. So during the past 6+ years of our cohabitation, I abstained from bringing them into the house (even though I think they're GREAT). Until they started showing up in the CSA box, that is. I can't very well throw out perfectly good veggies, now can I? (THANK YOU, FFTY, for bringing the little sprouts back into my life!).

An internet search and some recipe tweaking led me to my new favorite Brussels sprouts. I grabbed the opportunity to make them while JR was watching the Superbowl (he was already yelling at the TV, so I didn't figure yelling about the smelly sprouts would make much of a difference!).

Give it a try and let me know what you think!

Spicy, Salty, Sweet Brussels Sprouts

1 Tbsp. olive oil
3 cloves garlic, crushed
about 25 Brussels sprouts
1 Tbsp. red pepper flakes
1 Tbsp. dark brown sugar
1 Tbsp. basalmic vinegar
1/2 tsp. coarse sea salt

Trim Brussels sprouts, removing outer leaves. Steam for about 10 minutes. While Brussels are steaming, heat garlic in olive oil. Once sprouts are tender, add them to the oil and garlic. Add pepper flakes. Stir and cook for about 3 minutes, until sprouts begin to brown. Add basalmic, sugar, and salt. Stir and cook for another 2 minutes. By then you should have some tasty sprouts!

better than a $10 martini

Yes, it is Sunday morning and I am writing about martinis. No, I am not drinking a martini at the moment (but once the cheering/yelling at the Superbowl starts from the living room in a few hours, I might need one!).

When JR and I first moved to the peninsula, we used to go to a bar & grill in our neighborhood every once in awhile for a martini and appetizer on a Friday night - it was a nice way to start the weekend. One time, we skipped the app and just had a martini. When the bill came, we realized that all this time, we'd been drinking $10 martinis. Not that there's anything wrong with a $10 martini, it's just that these particular ones didn't quite measure up to the price point. So, like pizza, we decided that we could outdo the local options even more locally - in our kitchen.

What makes a good martini? you might ask. Yes, it's imperative to start with good quality alcohol. I tend to favor Level vodka. We currently have vermouth that the local wine shop recommended - Boissiere Extra Dry - and it's quite good. But in my opinion, what really makes the martini comes down to one simple thing: O-L-I-V-E-S.

Momentarily, I'll walk you through my personal favorite olives-for-martinis combo. But first, let's rewind a couple of years to my inspiration. I experienced one of the most fantastic martinis I had consumed to date in Bremerton, WA with my good friend Emily. Anyone who's ever been to Bremerton, WA can imagine my surprise at this (it's a military town, where cheap beer is definitely more plentiful than good martinis). The magic combo that made the martini? Blue cheese stuffed olives.

Fast forward to today. Here's my rendition:

Better than a $10 Martini
makes 2 martinis

ice
1 oz dry vermouth
4 oz high quality vodka
4 black olives (the kind from the olive bar, not from the can!)
4 pitted large green olives (ditto!)
blue cheese (I use Point Reyes)


Fill two martini glasses with ice. Allow to sit and chill while you prepare the olives.

Stuff the green olives with blue cheese. On a martini pick, alternate black olives with the stuffed green olives so that you have two of each kind on each pick (ending with a stuffed green olive). Set aside.

Discard ice from glasses. Pour about half a shot of vermouth into each glass. Over the sink, swirl the vermouth in the glass to coat the sides, dumping about half down the drain (the rest remains in the glass). Add an olive pick to each glass.

Add the vodka and a handful of ice to a shaker; shake about 10 times. Strain into martini glasses. Cheers!
Blog Widget by LinkWithin

Popular Posts