Saturday, January 2, 2016

roasted butternut squash and caramelized onion galette


Hmmm. Let's see if I can remember how this works.

It's been nearly a year since I've posted anything here. That's not to say that I haven't been cooking. But between babies and moving and a book and, well, life, making something delicious and also writing down notes while cooking, snapping prep and food pics and penning witty posts... the former I like to think I do a decent amount of, but the rest has not been high on my priority list.

This is not to say that will necessarily change. But if I find myself with some rare and treasured free time, perhaps now and then I'll be inspired enough to both create good food and even take some pictures and write about it. No promises, though. There is another baby on the horizon, so much time will be spent there, however perhaps I'll receive culinary inspiration from the little darling as well. And there are already two little boys who show an early interest in food and cooking, which is another worthy reason to spend good time in the kitchen.

Speaking of which, this past holiday week has involved a lot of good time in the kitchen. I did something that I haven't done for a very long time: I got out a few cookbooks and flipped through them. I had a stack of post-its and a pen in hand, used to flag pages with recipes of interest and jot down ingredients needing to be procured. This exercise has led to a number of yummy things: molasses oat bread (Avery and Dorian made their own mini-loafs!), citrus barley risotto, hedgehog potatoes, poached sole with lemon caper and white wine reduction, kale salad with cherries and walnuts, whole wheat bread, a potato/bacon/green onion frittata, and—what I would consider the highlight of the week's kitchen adventures and the topic of this post—roasted butternut squash and caramelized onion galette.

The recipe is from The Smitten Kitchen Cookbook (which I'm pretty sure was gifted to me by Marika; if so and you're reading this, thank you!). It takes a little time, but none of the steps are particularly difficult—unless you consider yourself mostly inept at making pastry crust, like me, though the great thing about a galette is its "free form," which for me removes the requirement of pretty-looking pastry that I never seem quite able to achieve, a shortcoming that's much less visible here than in items like pies and tarts. The result is aesthetically interesting (which is my nice way of saying my dough was still ugly) and incredibly tasty.

With a quick internet search, I was also able to find the recipe on the Smitten Kitchen site (here), though it looks like it's for about an 8-inch galette serving six, while the one in the cookbook that I followed is for a 12-inch galette serving eight. Like the author, Randy, the boys, and I were able to get three full meals out of it. If you're going to go through all the work of making the pastry, roasting the squash, and caramelizing the onions, I'd recommend the following big version so you can enjoy the fruits of your labor for a while!

I followed the pastry ingredients and instructions exactly, but read through the rest and executed from memory (and experience), so there are probably some minor variations from the original. Here's what I did:

Roasted Butternut Squash & Caramelized Onion Galette
Yields 12 inch galette serving 8

For the pastry:
2 c. all purpose flour (I had bread flour on hand, so used that)
1/2 c. whole wheat flour
1/2 tsp. salt
1 c. (2 sticks) cold unsalted butter
1/2 c. sour cream
1 Tbsp. white wine vinegar (I substituted champagne vinegar because I was out of wwv)
1/3 c. ice water
1 egg yolk, beaten (for glaze on assembled galette, not dough)

For the filling:
1 butternut squash
2 Tbsp. olive oil
salt and freshly ground black pepper
2 Tbsp. butter
2 large yellow onions
a pinch of sugar (I used muscavado)
a pinch cayenne pepper
2 c. grated fontina cheese
1 tsp. chopped fresh thyme

Start by making the pastry. Combine flour and salt in a bowl. Add whole sticks of butter and use a pastry blender to break up butter until the mixture is the texture of cornmeal. In another bowl, whisk together the sour cream, vinegar and water. Pour over butter-flour mixture. Stir until dough forms, kneading it a bit of needed to bring it together (I did, mine was a bit dry though probably because I was a little shy of the 1/2 c. sour cream). Pat dough into a ball. Wrap in plastic wrap and chill in refrigerator while you prep the rest.

Next, roast the squash. Preheat oven to 400 degrees. Peel the squash, halve it and scoop out seeds. Chop into roughly 1/2" pieces. Pour olive oil onto rimmed baking sheet. Add squash and stir to coat. Arrange squash in a single later. Sprinkle with salt and pepper. Roast for 30 minutes, or until squash is tender, stirring occasionally. Set aside to cool.

While squash is roasting, caramelize the onions. Melt butter in a large frying pan over medium heat. Cut onions into thin half moons. Add to pan, along with sugar and cayenne. Reduce heat to medium-low. Cook onions, stirring occasionally, until golden brown, about 30 minutes.

Mix squash, onions, grated cheese, and thyme together in a bowl.

Now, you're ready to assemble the galette. Roll out dough on a floured work surface to a 16- to 17-inch round. Transfer to parchment-lined baking sheet. Spread squash mixture over dough, leaving a 2- to 3-inch border around the edge. Fold over the border, pleating the edge to make it fit (the center will be open). Brush outside of crust with egg yolk.

Bake in 400 degree oven until golden brown, about 45 minutes. Remove from oven and let stand for five minutes, then slide onto a serving plate. Cut into wedges. The galette can be served hot, warm, or at room temperature.

One year ago: lamb flatbread
Two years ago: mmm...hamburgers!
Three years ago: black bean brownies
Four years ago: chocolate pistachio shortbread
Five years ago: sautéed green beans with fried shallots
Six years ago: my very first post! where the magic happens

Sunday, January 26, 2014

perfect peanut butter cookies


When I found myself with some (precious) extra time Friday afternoon, I decided to make cookies. I wanted to venture from the cookies I make almost every single time, and as I was mentally flipping through options (snickerdoodles, chocolate crackles, raisin oatmeal), my mind landed on peanut butter cookies and the decision was made.

I've never had a go-to peanut butter cookie recipe. Rather, I'd look up something new pretty much each time online, and inevitably be a little disappointed each time. Like Goldilocks and her porridge, the peanut butter cookies I made never turned out just right. They were too flat. Or too cakey. Or not peanut-buttery enough.

My lack of go-to peanut butter cookie dilemma exists no longer. I have found the magic combination of steps and ingredients that yield the perfect-sized, crunchy-on-the-outside while chewy-in-the-center, withstands being dipped in a glass of milk and perfectly peanut-buttery peanut butter cookies. The accolades belong to Smitten Kitchen (who adapted her recipe from the Magnolia Bakery cookbook), where my main change to the original recipe was to omit the peanut butter chips and chocolate chips (I didn't have the former and wasn't in the mood for the latter, though perhaps will test out their inclusion another time). Also, she flattened with a spatula, whereas I opted for the more traditional fork criss-cross. I used natural peanut butter (where the only ingredient is peanuts).

Rather than mostly re-type the recipe, I'll direct you to the original here.

Avery enjoyed his very first peanut butter cookie (yes, even this vegetable-pushing mom lets her offspring enjoy a cookie every once in a while), alongside his sippy cup of milk.

I hope you enjoy them as much as he did!


Wednesday, January 8, 2014

lamb flatbread


One Christmas gift from hubby this year was a subscription to donna hay magazine. I have one of her cookbooks (The Instant Cook) and cook from it regularly. I'm pretty excited to have the guaranteed regular arrival of new recipes to my doorstep from her for the next year.

I was a little confused by the Oct/Nov 2013 issue that I have in my hot little hands currently, as the topic is Spring. Which seems a little out of season. I live in California, where it is never exactly winter, but it's still clear that spring and the fresh produce that comes with it is a ways off in the future. Still, there were a number of (non-spring-specific) recipes that caught my eye: sesame-crusted pork schnitzel with asian greens, chicken & kale & lentil slaw, green fish curry. The recipe that called out to me to make immediately was the spicy lamb flatbread.

The lamb flatbread was featured in a "10 under 20" section, focused on weeknight meals that are supposed to take 20 minutes or less to prepare. I'm not sure I pulled it together that quickly, though I also was unable to locate the prepared onion relish that the recipe called for, so I made some myself which added to the time (though I'm pretty sure the result was at least as - if not more so - tasty).

It didn't occur to me to snap pics the first time around (I guess I really am out of the habit, right?!?), so the pic featured above is from our leftover version that I made two nights later (only enough lamb for one more flatbread, so alas, Randy and I had to split it!). The combination of flavors is bright (as is the dish visually), and it manages to be both relatively light and filling at the same time. I paired it with a spinach salad dressed with yogurt mint dressing.

I'll definitely make this one again!

Spicy Lamb Flatbreads
Serves 4
Note: the magazine is Australian - I'm not entirely sure why some things are given in cups but other in grams, but I've provided the original measurements as well as the non-metric conversions in case you're cooking in the US and not a pro with the cooking scale like me.

500 grams ground lamb (this equates to just over a pound)
2 cloves garlic, crushed
1 tsp. ground cumin
2 tsp. dried chili flakes
1/3 c. store-bought caramelized onion relish*
sea salt and cracked black pepper
2 Tbsp. olive oil, plus extra for brushing
4 large flatbreads
1 c. greek yogurt
250 grams cherry tomatoes, halved (this equates to a little more than a cup)
1/2 c. mint leaves (I roughly chopped mine)
1/4 c. toasted pine nuts, roughly chopped (I left mine whole)
2 Tbsp. lemon juice
*As I mentioned, I wasn't able to find this. Instead, I cokked a small chopped onion in olive oil over medium-low heat for about 20 minutes, until it was a deep golden brown. I then mixed the caramelized onion with some apricot jam and a splash of red wine vinegar. Not a perfect substitution, I'm sure, but it worked!

Place lamb, garlic, cumin, chili flakes, caramelized onion, salt and pepper into a bowl and mix well to combine. Heat a large non-stick frying pan over high heat. Brush the flatbreads with 1 Tbsp. of oil and cook for 30 seconds to 1-minute each side, until golden. Remove and set aside.

Add remaining oil and the lamb mixture to the pan and cook, breaking up any lumps with a wooden spoon, for 6-8 minutes, until golden and cooked through. Spread 1/4 cup yogurt over each flatbread and top with lamb, tomatoes, mint, and pine nuts. Drizzle with lemon juice.

Tuesday, December 31, 2013

happy new year!


2014 has already arrived in some parts of the world, and will be here at my home on the West Coast very soon. It's amazing for me to look back and think about all of the things that happened in 2013. Unfortunately, keeping up with my posts here was not one of them. Much cooking happened, but the time I would have spent blogging about said cooking was mostly usurped by life. Mainly, a recently-turned-one-year-old life named Avery (the pic of him above was taken this morning). I can't think of a better reason to spend less time in front of the computer. 

That said, Christmas brought with it some inspiration that will hopefully be lasting and mean I will make the effort to carve out some time for Cole's Kitch again. One source of inspiration is the sparkling new camera from hubby (thank you thank you thank you!) that will hopefully manifest as improved pics of my culinary adventures. Others come in the forms of cookbooks, magazine subscriptions, and new fun kitchen tools, like the one pictured below that was used for the first time at breakfast this morning (in case it's unclear, that bunny on the right is a hard boiled egg!).


The kiddies are going to love these Japanese egg molds.

Yes, kiddies.

As in plural.

Next year at this time, we'll be a family of four!

Wishing a very happy new year to you and yours!

Thursday, August 22, 2013

easy meat lasagna


As I was making lasagna last week, I thought... nearly-8-month-old Avery could eat some of this. I haven't introduced wheat yet and I like to put eggs in my lasagna (which, from what I've read, are a no-no until after the first year), so I decided to take some of the pre-lasagna components and blend them into a tasty dinner for the little one. Here's what I did:

Easy Meat Lasagna (+ baby's first beef!)
Serves 8-10

olive oil
1 medium yellow onion, chopped
2 cloves garlic, minced
fresh or dried oregano
1.5 pounds lean ground beef
16 oz. whole milk ricotta
2 eggs
1/4 tsp. white pepper
3 c. fresh mozzarella, grated
1/3 c. parmesan, grated
3 c. marinara sauce
12 no-cook lasagna noodles
fresh basil, chopped, to top

Heat olive oil in a large skillet over medium heat. Add onion and garlic. Cook until softened, a few minutes. Add oregano (we have an oregano plant that is out of control, so I went a little crazy here and used the leaves from 4 dried sprigs - probably about 2 Tbsp.). Stir. Add beef, breaking up with a wooden spoon as it cooks.

If you're cooking for baby: Put a couple spoonfuls of the ricotta into a food processor. Once the meat is totally cooked, add a couple spoonfuls of the meat and onion mixture to the processor bowl. Add a spoonful or two of marinara and process until desired consistency. This created Avery's first encounter with beef. He devoured it.

Mix the remaining ricotta (or all of the ricotta, if you're only cooking for adults) with eggs, white pepper, and half of the parmesan together in a bowl.

Spread a couple spoonfuls of marinara in the bottom of a 9x13 glass baking dish. Arrange a single layer of noodles. Top with more sauce, beef mixture, ricotta mixture, and a sprinkling of mozzarella. Add another layer of noodles and repeat. On your last set of noodles, top with the remaining marinara and cheese. Sprinkle remaining parmesan and basil on top.

Cover with foil and bake at 375 degrees for 40 minutes. Remove foil and bake for additional 10-15 minutes.

The piece pictured at the top of this post was topped with the first ripe tomato from our garden!

Friday, August 16, 2013

squash, kale, and black bean baked burritos


Baby Avery's second meal with kale coincided with his first encounter with butternut squash. On this night, the grown ups enjoyed roasted butternut squash, kale, and black bean baked burritos, while Avery's meal consisted of pureed squash, kale, and black beans (pictured above). All were satisfied!

Squash, Kale, and Black Bean Baked Burritos
Serves 4 plus baby

olive oil
1 medium butternut squash
1 big bunch curly kale, de-stemmed and chopped
1/2 yellow onion, thinly sliced
1 tsp. cumin
1/2 tsp. oregano
1 can black beans, rinsed and drained
1 c. monterey jack cheese, grated
4 whole wheat tortillas
1 c. of your favorite salsa

Cut squash in half lengthwise and remove seeds. Brush with olive oil and place cut-side down in glass baking dish. Roast in 400-degree oven until soft, about 60 minutes.

Heat 2 Tbsp. olive oil in a large skillet over medium heat. Add onion and cook until softened and beginning to color. Add kale. Cover and allow to steam for about 2 minutes, until bright green and starting to cook down. Uncover and add cumin and oregano, stirring well to coat.

For the baby: Scoop a couple spoonfuls of the roasted butternut squash and put into the bowl of a food processor. Add a scoop of the kale mixture and a spoonful or two of black beans. Process to desired consistency, adding a bit of water if needed.

For the grown ups: Heat oven to 350 degrees. Divide remaining butternut squash, kale, and black beans among the 4 tortillas. Top with cheese (reserving about 1/4 cup) and roll into 4 burritos. Place burritos in glass baking dish. Spoon salsa over the top. Sprinkle with remaining cheese. Bake until cheese is melted, 10-15 minutes.

Wednesday, July 31, 2013

kale! (and cannellini)


My love of kale is well-documented. Given that, it's perhaps strange that I've waited this long to introduce the cruciferous green to the little one. That was remedied last night.

I had been thinking earlier in the week about combining kale with garbanzo beans for Avery. But then an even better bean entered my head: cannellini. Specifically, I thought of kale and cannellini crostini - a lovely appetizer with kale that is one of my favorite recipes. On Monday night, the grown ups in the house enjoyed these for dinner along side a big salad. Last night, Avery tried the pureed version of the topping from his carseat perch in the busy french bistro where Randy and I dined. He devoured it.

The kale and cannellini crostini recipe can be found here. Knowing that I was going to sequester some of the topping for Avery, I omitted the red pepper flakes entirely and seasoned the assembled crostini with salt and pepper (rather than the topping) to avoid spicing or salting up Avery's meal. I opted for low sodium vegetable stock. No pecorino for the little one, either.

Puree the topping (adding a little more stock if needed for desired consistency) and viola! Who knew that a tasty appetizer could double as baby-meal?!?

Thursday, July 11, 2013

a new chapter: cooking for baby (and us)


I can hardly believe that Avery is 6 months old already. It seems to have happened in the blink of an eye, and yet we've been through so much together since he arrived. One of the latest adventures in babydom has been the introduction of solid food. I had been looking forward to this for quite some time, excited to see his reaction at each new taste.

It has been a very fun adventure so far. I've been making the food (hubby gifted a fun contraption that both steams and purees the food; we've also been mashing what can be mashed and finding lots of great uses for the immersion blender on things that have been stewed on the stovetop or roasted in the oven). Over the past few weeks, Avery has enjoyed a range of veggies and fruits: yams, peas, carrots, green beans, avocado, banana, apples, pears, watermelon and mango. More recently, we've started combining single foods into medleys and also incorporated yogurt (pictured above!) and oatmeal.

Avery is a great eater. The avocado and green beans (individually) that didn't go so well the first time around turned out to be more a function of his mood than his taste, with subsequent trials being successful endeavors. We've been warned not to get too excited about Avery's accepting palate (some say that infants this age mostly eat everything and that it's when they get a little older that it becomes challenging), but I am hopeful that the varied diet I ate while pregnant and now eat while breastfeeding plus an early emphasis for Avery on fresh, organic fruits, veggies, and whole grains (plus the necessary dairy and, soon, meats) will help Avery keep his already emerging love of real food through childhood and beyond.

It occurred to me that a fun way to resurrect this blog (which has been dormant since March...my longest break from it since inception) would be through a slight change in focus: cooking for baby and us. The idea is that variations of the main dish will be able to feed the whole family (6-month-old inclusive).

I'm excited for the day that Avery will be able to routinely eat what we eat. In the meantime, I'll be cooking for us with him in mind, making meals and using components for baby. These are the recipes I'll share with you here. Fret not if you aren't feeding a baby currently, I'll make sure the main dishes are tasty enough to stand on their own. First up: peaches. Enjoy!

For us: cornmeal peach cobbler
For baby: roasted peaches

For filling:
10 ripe peaches (reserve 1-2 for baby)*
2/3 c. brown sugar
2 Tbsp. flour
the juice of half a lemon
cinnamon
salt
*A good-sized peach will result in about 4 ounces of food for baby.

For dough:
1 1/2 c. flour
1/2 c. fine ground cornmeal
1/3 c. brown sugar
3 tsp. baking powder
1/2 tsp. salt
6 Tbsp. cold butter, sliced
1 c. buttermilk**
**I rarely have buttermilk on hand, this case being no exception. Instead, I used a cup of milk whisked together with the juice of half a lemon, a trick learned from hubby.

Note: I don't mind my peaches with skin on them, but baby does, so I peeled the peaches for baby but not the ones for the cobbler. If the skin bothers you, go ahead and peel them all.

Heat oven to 425 degrees. Slice all peaches except the 1 or 2 for baby and put into a large baking dish (I used an 11x13 glass dish). Meanwhile, heat a pot of water to boiling on the stovetop. Cut through the skin of the peaches for baby, making an 'x' on one end. Put in boiling water for 1 minute. Remove, allow to cool enough to be handled, and peel. Slice the peeled peaches and place in a small baking dish. Add a dash of cinnamon (optional) and set aside.

To the cobbler peaches in the large baking dish, add brown sugar, flour, lemon juice, a couple dashes cinnamon, and a pinch of salt. Mix well.

In a bowl, combine the dry ingredients for the cobbler dough. Cut in the butter with a pastry cutter until the mixture resembles coarse meal. Stir in milk. Spoon the dough onto the prepared cobbler peaches in the large baking dish (none for baby!).

Place both the large and small baking dishes in the hot oven. Remove the small baking dish after 15 minutes. Puree in a food processor or using an immersion blender (for older babies, you may even be able to mash directly without the need for electronics). The cobbler will cook for another 5-10 minutes, until golden on top.

We enjoyed our cobbler with friends and family and a big scoop of Milwaukee frozen custard. Baby enjoyed his roasted peaches with a big spoonful of organic whole milk yogurt.

Thursday, March 14, 2013

happy birthday, Randy!


Just a quick post today to wish my love the happiest of birthdays today and share some of the recipes we've enjoyed in the past week. A surprise evening with friends last Saturday included the following tasty treats:
The empanadas take some work, but I feel like you can taste the hands-on goodness in the final product. The steak was incredible (didn't even need the chimichurri sauce, as Paul said, though it did provide some good tanginess and nice bright color). The cheesecake was also fantastic - the trick comes with the caramelization of the sugar and creates amazingly creamy, rich chocolate wonderfulness. It will definitely be my go-to cheesecake going forward.

Ok, off to make some more treats now: Saturday was pre-birthday celebration. Today's the real deal.

Happy birthday, my love!

(And if you're interested in where baby hangs out while I cook, scroll all the way down.)


Sunday, March 3, 2013

birthday meringues


Made by my lovely husband to celebrate the day today (just one part of the amazing smelling feast he's currently pulling together in the kitchen). I don't think I'm allowed to see the recipe (they are his special treat), but I think you can find some related tips here

Tuesday, February 26, 2013

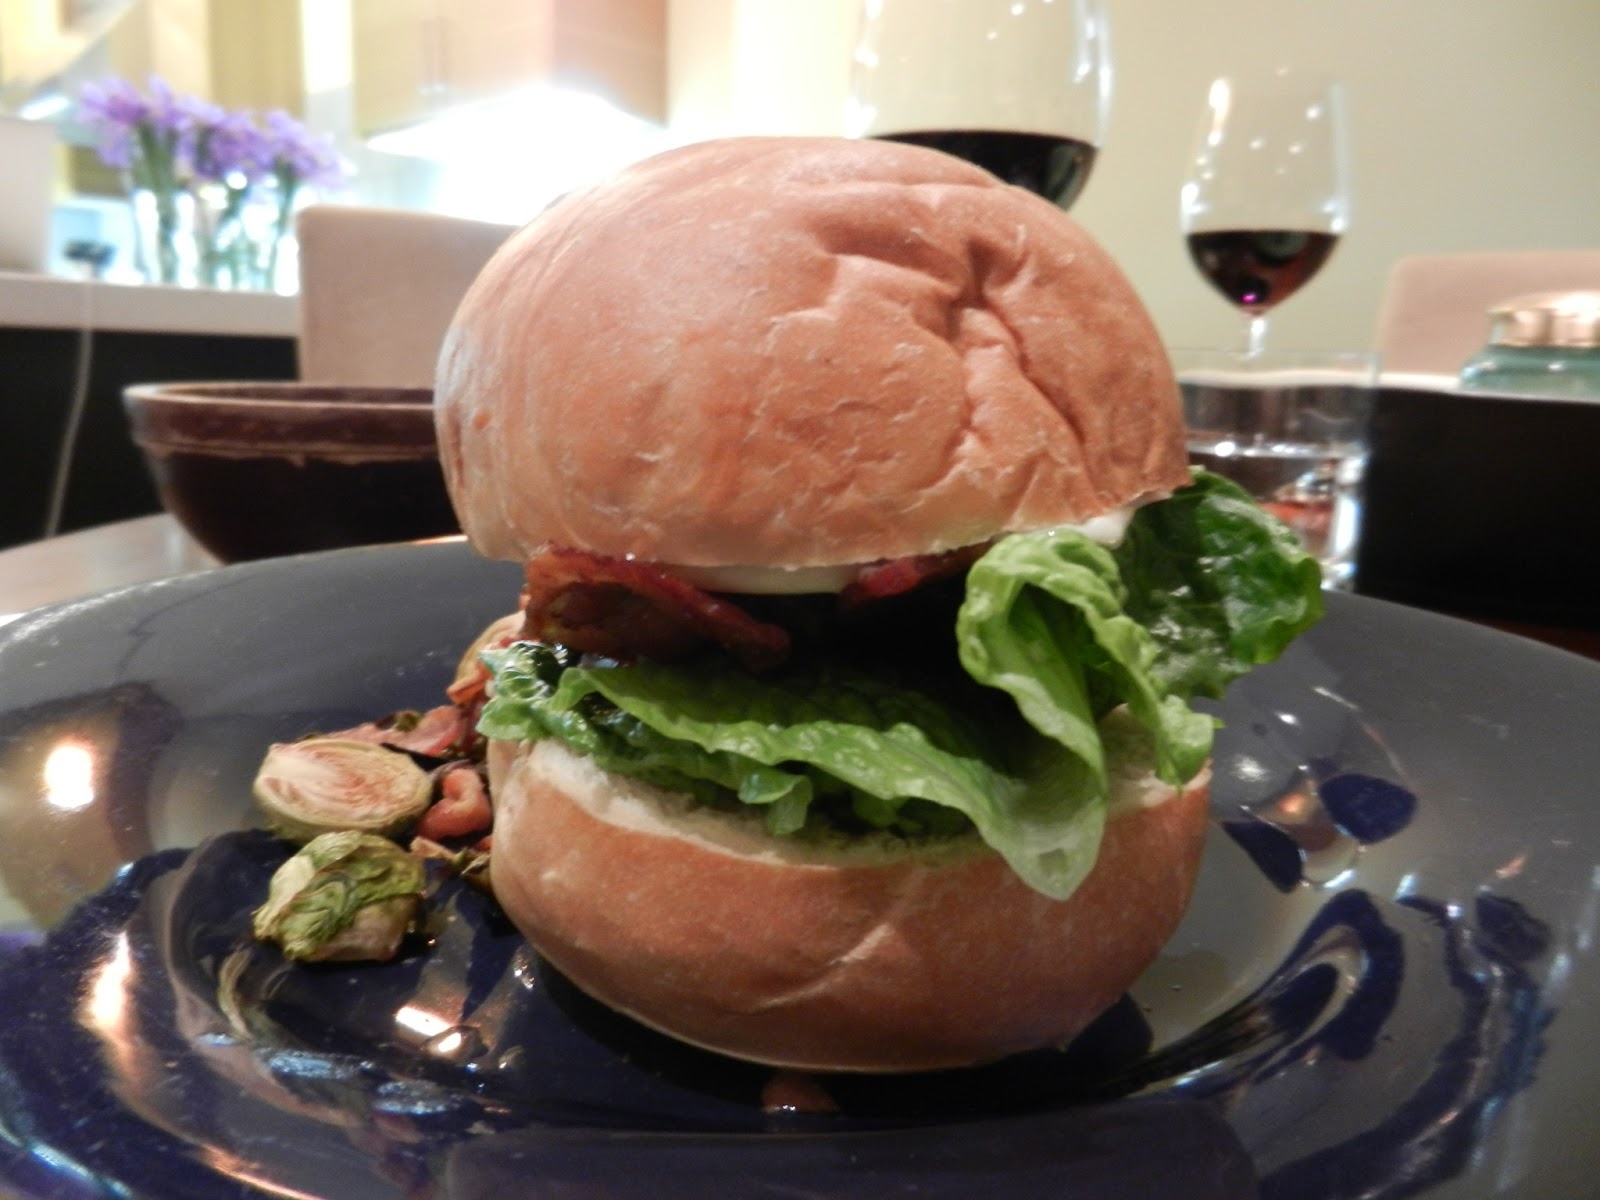
mmm... hamburgers!


I could call my kitchen long abandoned, except that wouldn't be quite right. My blog, on the other hand, has been downright ignored over the past few months; it's crazy to think pumpkin seeds were "in season" the last time I wrote here. So much has happened since then. And there has been cooking - in a number of kitchens... one in Milwaukee, where our anticipated short Christmas trip turned into a 6-week adventure after the early (and amazing) arrival of our son... two kitchens in the city of San Francisco - one in a temporary place, and the current one that I think (hope) is going to stick a bit longer than the last few have.

Given the new baby, new house, and new city (everything old is new again, right?), I thought it only fitting that my first post from the new kitch be something new, something I haven't made previously. I don't generally cook a lot of meat. Perhaps the stint in the midwest inspired me. On the menu in this post: burgers. The first time I've ever made burgers. They were really good burgers. So good, in fact, that I think Randy has convinced me to make them again this week for our out of town visitors. Here's what I did:

Burgers!
Adapted from this Food Network recipe
Makes 4

8 slices good quality bacon
16 oz. grass fed ground beef
2 tsp. garlic powder
2 tsp. dried onion
2 tsp. worcestershire powder
1 tsp. kosher salt
freshly ground black pepper
4 hamburger buns, split
4 slices sharp cheddar
4 slices tomatoes
romain lettuce leaves
mayonnaise
BBQ sauce

Heat oven to 450 degrees.

Cook bacon in a large skillet until crisp, turning halfway through cooking. Remove from pan to a paper towel-lined plate. Reserve your pan of bacon fat; this is where you're going to cook your burgers.

Meanwhile, spread ground beef out on a piece of parchment paper. Season generously with salt, pepper, and other spices. Divide into 4 portions. Using hands, form each into a ball-shape by gently tossing from one hand to the other. Form each portion into a patty about 3 1/2 inches wide and 1 inch thick.

While your bacon pan is still hot (or if it has cooled, heat it over med-low for five minutes), raise heat to high and add patties and cook, turning once, until well-browned, about two minutes per side. Transfer patties to a foil-lined baking sheet and put in the preheated oven. 11 minutes yielded perfectly medium burgers for me (original recipe says 8-9 minutes for medium rare, 10-11 for medium, and 13-15 for well done). For the last 5 minutes of cooking, I topped the burgers with cheese and also toasted the buns.

Spread toasted buns with mayo and BBQ sauce. Top with cheesy burger, bacon, lettuce, and tomato. Enjoy your tasty burger.

You'll note that no burger pic accompanied this post. I actually wasn't anticipating the burgers would be good enough to blog about, so didn't take any pics. Randy snapped a couple, but none that I want to post.* Not to fret: I won't let you go with no photos at all. Because it's impossible (for me at least) to write my first post-baby cole's kitch post and not include a pic of said baby (who really is the cutest little guy on the planet), I'll leave you with this:
*Update: I found a half decent one, so now you get a picture of the burger and one of the baby!

Wednesday, October 31, 2012

spicy, salty, sweet toasted pumpkin seeds


Randy and I carved pumpkins last night. We were thinking it was probably the first time either of us had done so in at least a decade. In addition to providing an evening of entertainment, this project produced about 3 cups of fresh pumpkin seeds. Certainly something productive needed to come out of that.

My recipe below was inspired initially by this article. But whereas they preserved spicy, salty, and sweet for three different recipes, I decided to try a combination all in one. The result? Delicious.

The aroma of sugar and spice fills the house as I type this. Perhaps it will attract the neighborhood trick-or-treaters? I hope so, as we have quite a lot of candy on hand. Happy Halloween!

Spicy, Salty, Sweet Toasted Pumpkin Seeds

3 c. fresh pumpkin seeds
2 Tbsp. melted butter
4 Tbsp. brown sugar
1 tsp. cayenne powder
scant 1 tsp. salt
1/2 tsp. cinnamon

Combine all ingredients in a medium bowl. Spread spice-covered seeds evenly on a parchment-lined, rimmed baking sheet. Bake in 350-degree oven, stirring every 5 to 10 minutes until golden brown and toasted, around 35 minutes total. The seeds will continue to crisp as they cool.

Friday, October 26, 2012

easy roasted brussels sprouts with bacon and apple


It seems there are many people in the world who don't appreciate Brussels sprouts. 

I will never understand why.

I made these last night. The sprouts were roasted to caramelized perfection. The salty bacon was offset in just the right way by the sweet apple and tangy vinegar. A perfect fall dish. Brussels sprout skeptics may even be swayed...

Friday, October 12, 2012

banana chocolate cookies


"These are like no cookie I've tasted before" was the precise quote from Randy. I'm not sure if that was meant to be a good thing or not, but I'm going to take it as such, because I think these cookies are amazing. No butter. No eggs. No flour. What holds them together? Well, you can probably guess based on the title (it's brilliant): bananas. Finally, something to do with overripe bananas that goes way beyond your standard banana bread. The recipe is from 101cookbooks and you can find it here.

Bonus: no eggs in the dough means even the pregnant lady can sneak a pre-baked bite!

Friday, September 21, 2012

cherry cheesecake


Our friends Vanessa and Marcus joined us for a lovely dinner last weekend. Vanessa's birthday had been earlier that week, so while planning the menu, I inquired about her favorite desert. Thus came my motivation for making my first ever cheesecake.

smitten kitchen has long been one of my favorite food blogs, particularly for desserts. It didn't let me down in this case - there were a number of delicious looking and sounding cheesecake recipes to choose from. I landed on the New York Cheesecake.

I followed the recipe exactly, so I'll let you check it out via the link above vs. repeat it here. A couple of my own learnings from the process (recounting these here in part so I can remember when it comes time to making again to ensure I do so perfectly the next time):

  • Oven temp: For the beginning super high oven temperature, I set my oven to 500 degrees (the highest setting before broil). I checked it religiously for the first 10 minutes to make sure I wouldn't burn the top. I got distracted between minute 10 and when the timer went off at minute 12, during which time the top of the cake progressed from a beautiful cream to an unwanted deep brown. I quickly covered it loosely with foil and reduced the oven temp to 200 degrees for another hour. Luckily, I had caught it before the top was actually burned (rather it was just sable in color and little overdone), however the graham cracker crust did get singed from this mishap. Next time, I'll start out at 450 or 475 and make sure I watch more closely for the full first 12 minutes.
  • Doneness: Not sure if it's done? This is apparently a common question, for as soon as I had "how do you tell if a cheesecake" entered into Google, it already knew the rest of my search term. I consulted a couple of sites (including this one) and consensus seems to be that a 2-3" wobble in the center when gently shaken indicates the right level of doneness (if left up to my own devices, I would have left it in longer, so I was glad to have consulted the wisdom of those who know more than me here.
  • Puffed up cheesecake: Don't stress that your cheesecake has puffed up an inch or more above the top of the springform pan when you remove it from the oven (I had fears that I would have to somehow neatly trim the top, and while this would have eliminated my slightly-overdone-brown-top problem, this seemed like a daunting task). After cooling to room temp and then in the fridge for a bit, the cheesecake was back into the confines of its pan.
  • The cherries on top: The cherry topping in the recipe is delicious and works well to cover up a less-than-perfect cheesecake.

Sunday, September 16, 2012

my newest favorite kitchen gadget


Randy came home with the gadget pictured above earlier this week. He was pretty excited about his find; I was skeptical (albeit suddenly more understanding of his insistance that we bought a pineapple while at the grocery store that same day before the "surprise" was revealed). You've perhaps guessed by now (if you didn't know already) that the strange looking tool pictured above is a pineapple slicer.

One use later and my initial skepticism regarding the necessity of this gadget has melted away. While the perceived difficulty of transforming a pineapple from whole form to edible has never kept me from buying one, this tool makes the process so...incredibly...easy. And fast. And much less messy than my slice-it-and-trim-away-the-tough-outside-part-with-a-knife process. I am generally not a fan of single-purpose kitchen gadgets, however will make an exception for this amazing pineapple slicer.

Need one of your own (or for a kitchen maven in your life)? Sur Le Table can meet that need here.

Sunday, August 26, 2012

what to do with leftover pizza dough


My posts here have been SLOW lately. It's not that I haven't been cooking, but rather that life has been pulling in many other (good but time-consuming) directions. I've actually had the intention to post several times over the nearly two months that have gone by since my last...but time passes and I forget how to put together the random notes I have written on stickies, lose the compelling angle to the recipe I was going to describe, or the photos get buried among others of travel, ferris wheels, and weddings.

This time, I am not going to let that happen.

For the past few days, Randy's cousin, Jeff, and Jeff's son, Sam, have been visiting. They've been exploring much of LA and the surrounding area - venturing so far as San Bernadino yesterday for a quest to Randy Rhoad's (guitarist for Ozzy Osbourne) tomb. All of this exploring means the need for sustenance is great. Or at least that's one of the ways I've rationalized making all of the food we have in the past few days.

Homemade pizza on Friday night saw Randy making an extra batch of dough just as stomachs were starting to feel full. He of course already had a plan for the extra dough - something I had done the last time we made pizzas and had too much pre-made purchased dough on hand - homemade cinnamon rolls.

I cobbled the following together from a few different recipes. We ate the leftovers reheated in the oven this morning, enjoying the last bits of the sticky goodness. Rather than repeat the dough recipe here, I'll refer you back to the last post that details Rudy's special dough.

A Little Orange Cinnamon Rolls
Serves 8-10

Rolls:
1 recipe pizza dough (minus a small pizza, in our case*)
Flour for dusting
2 Tbsp. butter, melted plus more to grease pan
1 c. brown sugar
2 Tbsp. cinnamon
*I used the 8x8 square pan pictured plus a smaller version that fit 4 additional rolls; with a full batch of dough, I'd recommend using a 9x13" baking dish.

Topping:
2 Tbsp. butter, at room temperature
2 Tbsp. orange juice
1 tsp. vanilla
about a cup powdered sugar

Grease pan with butter. Roll prepared dough into a large rectangle. Brush with melted butter. Stir together brown sugar and cinnamon. Spoon mixture evenly over butter-coated dough. Beginning with long side facing you, roll dough into a long roll. Use a sharp knife to cut into 1 1/2" slices. Arrange slices side by side in baking pan and cover with plastic wrap. Refrigerate 30 minutes to overnight (I did the latter - makes for an easy morning breakfast).

Preheat oven to 350 degrees. Remove rolls from fridge and discard plastic wrap. Bake rolls until golden, about 30 minutes.

Meanwhile, mix topping ingredients, adding more sugar as needed to get a paste-like consistency. Spoon over hot rolls after they come out of the oven. Let sit a few minutes for the sugary buttery topping to melt; enjoy while still warm.

Thursday, July 5, 2012

pizza night!


This holiday week has involved an intense amount of midwestern heat and great food (some highlights: italian sausage, bbq chicken, a tasty reuben, and oh so much yummy custard!). Continuing this focus, we spent yesterday evening at Randy's brother's house, savoring hot pizza (amidst hot temperatures) straight from the pizza oven. Add to that Randy's family, some tasty guacamole, pina coladas, and fireworks, and you have yourself a wonderful holiday.

I lamented to Rudy, pizza-maker extraordinaire (and pizza oven craftsman), about my personal woes making pizza dough. Somehow, it never turns out quite right for me (to the point where Randy had to make totally new dough the last time I tried). Rudy was kind enough to share his recipe, which I've included below. Toppings for our pizzas last night involved various combinations of: tomatoes, sauce, mozzarella, sausage, onions, mushrooms, peperoni, ham, pineapple, and fresh basil from the garden. The final pizza out of the oven was a sweet cinnamon-y treat. Here are a couple pics of the delicious masterpieces:


The evening ended with a local firework show, observed from the comfort of the back deck. Thanks Rudy and Veronica, for great food, family, and a fantastic 4th of July!

Rudy's Pizza Dough

1 packet (1/4 oz) active dry rapid-rise yeast
3 c. bread flour
1 1/4 c. lukewarm water
1 1/2 tsp. honey
1 tsp. salt
1 Tbsp. olive oil
corn meal, for sprinkling

Mix half of flour with yeast, salt, water with honey dissolved in it, and olive oil. Beat with an electric mixer for 3 minutes on high. Mix in remaining flour (dough will be very sticky). Knead for 5 minutes on floured surface until smooth.

Place dough in a lightly oiled bowl and cover with plastic wrap. Let rise for 10 minutes in a warm place. If using a pizza stone, place it in oven. Preheat oven to 500 degrees (or hotter if you're using a pizza oven like Rudy's, which gets up to 700+ degrees!). Punch dough down and grab a handful. Cover the dough, rolling surface, and rolling pin with flour. Roll to about 1/4 inch thick.

Sprinkle your pizza peel or a ridge-less baking sheet with cornmeal. Place rolled dough on the cornmeal dusted pan. Top dough with desired toppings and slide onto hot pizza stone. Baking time will vary based on the temperature of your oven. They took about 2 minutes each in the 700-ish degree pizza oven.

Saturday, June 23, 2012

southwest stuffed bell peppers


A recent clear sign that I'm feeling fully settled in the new house and new city: I signed up for a local CSA. This means that every Tuesday, a box will arrive at our doorstep filled with fresh fruits and vegetables from local farms. The first delivery arrived last week with a wide variety of mouthwatering contents: nectarines, baby bok choy (yummm), romaine lettuce, beets, 3 heads of garlic, an avocado, carrots (from Coachella!) and two beautiful green bell peppers.

I love getting a box full of surprises each week. Even though I'm pretty adventurous at the grocery store and farmers' market, inevitably the box contains something (or sometimes, a number of things) that I likely would not have considered buying. This often leads to meals that I otherwise likely would not have thought to make. I love that sort of inspiration and the "outside of the box" thinking (pun intended!) it pushes me to partake in.

The challenge last week was that it had slipped my mind that the box was coming when we grocery shopped the weekend prior. Which left us with more than normal amounts of produce. Not a bad problem to have, but I had to get creative to ensure nothing went to waste. So, while the green bell peppers were beautiful, I had to figure out a good way to put them to use along with the red and yellow bell peppers I'd picked up at the grocery store. Enter stuffed peppers.

Before the box arrived, one of the week's dinner dishes in my head involved squash and black beans. I decided to repurpose these, plus some other ingredients I had on hand, into a southwestern pepper stuffing.

We ate two of the peppers hot out of the oven with a big side salad. The remaining two went directly into the freezer, to be rebaked at a later date, so that we could refocus our energies on eating the rest of our veggies over the remainder of the week!

Southwest Stuffed Bell Peppers
Serves 4

4 bell peppers, tops cut off and seeds removed (I chopped the tops and threw them in our salad)
2 Tbsp. olive oil
1/2 red onion, diced
2 cloves garlic, minced
1 small jalepeno, seeded and minced
a sprig of fresh oregano, chopped
2 Tbsp. cumin
2 bottleneck squash, diced
1 can black beans, drained and rinsed well
1 1/2 cups cooked brown rice
1/2 cup salsa
1/2 cup cheese, shredded (I would have used monterey jack if I had it, but in this case used the cheddar we had on hand)
sour cream (for topping, if desired)

Heat a large pot of water over high heat until boiling. Add peppers and boil 4 minutes. Remove carefully with tongs (another good use for the instrument I didn't see the need for but Randy convinced me were essential) to drain on a paper towel.


Heat 1 Tbsp. olive oil in a medium pan over medium heat. Add onion and garlic and saute until translucent. Add oregano and cumin, stirring to coat. Add jalepeno and cook 1 min. Add squash. Cook 2 minutes, until squash just starts to become tender. Remove from heat.

In a large bowl, mix squash mix together with beans, rice, and salsa.

Use the remaining 1 Tbsp. of olive oil to oil the bottom of a glass baking dish. Fill each pepper with the squash-bean-rice mixture and place in baking dish, open side up. Top with grated cheese.

Bake in a 350-degree oven for 30 minutes. Serve hot, topped with sour cream. Enjoy!

Sunday, May 13, 2012

I don't know what to call these...except delicious

Well, that's not entirely true - we did come up with a name...

...crunchy pig bowls.

Which admittedly may not resonate with all. But name aside, they are delicious. And ingenious. A bowl made of prosciutto, into which you can put any number of things that will subsequently be permeated with salty pork flavor as it bakes.

My friend Marika sent me some delicious looking recipes from Coastal Living magazine, which arrived in the mail last week (thanks Marika!). All looked scrumptious, but the 'individual prosciutto-and-spinach pie' recipe looked so good I had to make it immediately. We had no prosciutto on hand, so I substituted thinly sliced uncured ham, which worked terrifically (better than the prosciutto even). We enjoyed our first crunchy pig bowls at dinner time with a generous side of green beans.

They were so delicious that I made them again for breakfast this morning: this time with prosciutto (pictured above). The original recipe is for 12 pies (made using a muffin tin). While this would be perfect for a large brunch, 12 pies is a little silly for two people. So my version makes 2 in my Le Creuset Croquettes (ramekins would also work). I put in way more spinach than called for (the original recipe calls for a cup for 12 - I put in a little more than that for 2). And the addition of a splash of milk makes them oh so creamy. That recipe follows.

Tonight, I will bake our mac and cheese in individual prosciutto cups. I'm pretty excited.

Individual Baked Spinach Eggs in a Pig Bowl
Serves 2

4 slices thinly sliced prosciutto (or 2 thin slices of ham)
two handfuls of spinach, chopped
1/2 c. sharp cheddar (I used a white english cheddar), grated
2 eggs
a little less than 1/4 c. 2% milk
freshly ground black pepper
a generous pinch herbs de provence

Preheat oven to 350 degrees. Place prosciutto slices into the bottoms and up sides of two ramekins, overlapping in a crisscross pattern.  Toss spinach with half of the grated cheese. Put half of the spinach-cheese mix into each ramekin.

Break eggs into a bowl. Add milk, pepper, and herbs de provence. Whisk well. Pour egg mixture over spinach, dividing between the two ramekins. Top with remaining cheese.

Bake 18 minutes. Turn on broiler and broil 2 minutes.

Remove from oven. Allow to sit for 2 minutes. Using a spatula, gently loosen your individual pies from their dishes and place them on plates to be served. Enjoy!
Blog Widget by LinkWithin

Popular Posts