Saturday, April 24, 2010

blueberry magic muffins


I've been taking a food writing class on Tuesday nights at Stanford for the past month. It's a five-week class and this coming week will be the last in the series. Our homework is to write about a recipe from our childhood.

This is a timely assignment, as I am spending the weekend at my mother's, affording the me the opportunity to talk about childhood foods and recipes with her in person. Between chemotherapy, her first blood transfusion, and everything that goes along with all of that, it's been a tough few days. Talking about food is a nice break from reality.

I had been reflecting on things I remember eating growing up. Doing so brings me back to my childhood kitchen: a long, narrow corridor between the mud porch leading running between the back door and the living room of a victorian house built around 1917 in Washington state. It seemed gigantic when I was little. White cupboards and stainless steel countertops lined one side, while the other was filled with a round wooden table, a hot water heater, a stove, and a refrigerator that would be considered positively retro compared to today's typical stainless steel behemoth, possibly even referred to as an "icebox." Open shelves lined the majority of the cupboarded wall, displaying pretty dishes: amber and turquoise goblets, delicate china depicting birds and flowers, intricate crystal dessert dishes.

I thought I remembered roosters on the wallpaper, but my mom wasn't sure, so we dug out an old photo album with pics from my first year of life. In addition to confirming the roosters on the wallpaper, the photos revealed other treasures that were too buried in my memory to recall. For example, a giant porcelain turkey sitting on the counter, which it turns out was actually a goose - Mother Goose - a cookie jar from my mom's childhood that also appeared in mine, but then broke at some point between then and now. The wallpaper contained bright red, green, and blue shapes against a light background: roosters, cherries, salt and pepper shakers, apples and pears. Red and white checkered towels added additional bursts of color against the pale cupboards.

When I think back to foods I ate in this kitchen, I remember quite a mix of things: pot roast, cabbage and noodles, or mexican straw hats for dinner, bologna and hot dogs that I would sneak, raw, from the fridge for a snack, peaches & cream oatmeal that I would climb up on the counter to retrieve and make myself. For homework purposes, I need something transportable; part of the assignment is to actually make the recipe that we write about and bring it to our last class as a sort of celabratory feast.

A consideration in addition to transportability is time. I don't get back to SF until Sunday night and likely have a long work day in front of me on Monday to make up for my days out of the office, which leaves Monday night to make my homework. I had been thinking of cookies, in particular, Corn Flake oatmeal cookies that always turn out perfect and are almost healthy enough to eat for breakfast (or so we've always told ourselves). But then my mom reminded me of another easy to make transportable option: Malto-O Meal "magic muffins". Bingo.

I'm not sure why they are magic, but that's what the recipe on the side of the box calls them. I remember eating these muffins on weekend mornings while watching cartoons. My mom generally made one of two variations: filled with raspberry jam or mixed with blueberries. She'd let me stir. This morning, I did a test run of the blueberry version (which I plan to make again on Monday night for class on Tuesday). I've switched out some of the original ingredients for healthier alternatives. They turned out as yummy as I remember: a pleasant, sandy texture due to the Malt-O Meal, just a tad sweet, with a juicy burst of blueberry in every other bite. It was also a great excuse to reminisce with my mom this morning - of both my childhood and hers. Here's the recipe for the muffins that accompanied our conversation:

Blueberry Magic Muffins
Adapted from the Malt-O Meal box
Makes 12

1 1/4 c. flour (I used a mix of whole wheat and all purpose flour)
3/4 c. dry Malt-O Meal cereal
1/2 c. brown sugar
3/4 c. rice milk
1/4 c. coconut oil, melted
1 egg
1 tsp. pure vanilla extract
1/2 tsp. salt
1/2 c. fresh or frozen blueberries

Preheat oven to 400 degrees. Line a muffin pan with muffin papers. If using frozen blueberries, run under cool water in a strainer to thaw.

Mix all ingredients except blueberries in a large bowl until well combined. Gently fold in blueberries. Scoop batter into lined muffin pans until 3/4 full. Bake 20 minutes, or until golden. Enjoy warm, topped with butter or cream cheese.


One year ago: beet ketchup

Sunday, April 18, 2010

sage & olive oil bread


When Marika and I were browsing at the kitchen store yesterday, a book caught my eye. Small and unassuming, the title was simply "quick breads". I love homemade bread, but it can get pretty involved with all of the waiting and kneading (much too involved for someone who is working long days and in the middle of multiple house projects, or at least that's what I've been telling myself). I was intrigued by the idea of easy, fast homemade bread.

I started flipping through the book, quickly realizing that it would need to come home with me. I was pretty much sold on the very first recipe: Tuscan fresh sage and olive oil bread. The cursory scan through the rest of the book revealed more must-make recipes, including molasses oatmeal loaf, pumpernickel and fig loaf, cracked pepper naan, and old-fashioned blueberry gingerbread.

The sage and olive oil bread is baking in the oven as I write this. This may sound funny, but when I woke up this morning, making it was the first thing I wanted to do. I'm already looking forward to having some slathered with butter along with my coffee once it's done baking (perhaps that will be the picture that will accompany this post?). Here's what I did:

Sage & Olive Oil Bread
Makes 1 medium loaf

3 c. all purpose flour
1 c. whole wheat flour
1 Tbsp. baking powder
2 tsp. fresh sage leaves, chopped
1/2 tsp. sea salt
2 large eggs
3 Tbsp. olive oil
about 1 c. milk*
*The original recipe calls for 3/4 c. of "not fat-free" milk. I don't typically have cow's milk on hand, so substituted soy milk, which worked fine. I found I had to use about 1 1/4 c. to get the sticky dough called for.

Preheat oven to 350 degrees. Lightly grease a baking sheet with olive oil.

Mix flour, baking powder, sage, and sea salt in a large bowl.

In a separate small bowl, beat eggs together with olive oil and milk.

Pour wet ingredients into dry and mix with a wooden spoon. The dough should be soft and slightly sticky (add more milk if needed).

Flour your hands and form dough into a ball about 7 inches across. Place on greased baking sheet. Score the top with a knife. Bake 45 minutes, until golden and the loaf sounds hollow when tapped underneath with your knuckles.

Transfer to wire rack until cool enough to slice. Enjoy!

Tuesday, April 13, 2010

chard & cheese muffins


It's a rainy Sunday as I write this. I have work and laundry to do, and yet the only thing I want to do is bake something warm in the oven. A little time aside to turn that thought reality should be ok, right?

I've been thinking about savory muffins since reading a recipe for spinach muffins in The Hummingbird Bakery Cookbook last week. It's funny, because my typical reaction to the word 'savory' is not a good one, I think in part driven by the Daring Bakers each month who do a savory twist on the dessert challenge to be innovative (savory gingerbread houses, really?). But I guess I'll have to withhold that opinion from now on, since today I took a would-be sweet breakfast muffin and turned it into green and cheesy goodness. Here's what I did:

Cheesy Chard Muffins
Makes 18

2 Tbsp. butter
1 small red onion, finely chopped
1 bunch red chard, leaves and center ribs separated and chopped
2 1/4 c. whole wheat flour
1/2 c. cornmeal
2 1/2 tsp. baking powder
1 /2tsp. cayenne pepper
1/8 tsp. white pepper
1 1/4 c. whole milk
1 egg
2 c. cheese, grated (I used 1 c. sharp cheddar and 1 c. pepper jack because that's what I had on hand)

Line muffin pan with paper liners. Preheat oven to 325 degrees. Melt butter in a saucepan over medium heat. Saute onion and chard stems until onion is transluscent.

Combine flour, baking powder, cayenne, and pepper in a large bowl. In a separate bowl, whisk the milk and egg together. Slowly pour into the flour mixture while stirring with a wooden spoon. Stir in the onion mixture, chard leaves, and cheese, mixing well until everything is evenly dispersed.

Spoon batter into the paper cases in mounded scoops. The whole wheat doesn't rise as much in the oven as its all-purpose flour counterpart. Bake in preheated oven for 40-45 minutes, until deep golden. Let cool slightly in pan then turn out on a wire rack to continue to cool.

These muffins would be great served with eggs at brunch or with a hot bowl of chili later in the day.


Sunday, April 11, 2010

cole's new kitch


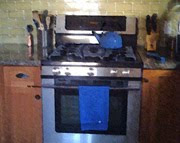
The move is complete and I'm settling into my new kitch. I'm writing this post from my desk, which now sits conveniently at one end of the kitchen. The beautiful glass chandelier above my head (that the previous owners graciously left behind for me and that is the cause of the very sore spot on the top of my head) provides a warm glow in stark contrast to the pouring rain outside (when is this California winter going to end?).

In addition to fresh paint, plenty of cupboard space and pretty blue granite countertops, my new kitch came equipped with a Viking stove that I'm eager to learn the moods of and partner with on new adventures in my new kitch. Stay tuned to see what we come up with!


One year ago: twice baked potatoes

Wednesday, April 7, 2010

vanilla cupcakes


Exciting news: this is my first post from our new kitchen! (More on that soon.)

Last weekend, while we were taking a break from moving to get a bite to eat, I discovered a gem in San Carlos: a small, independently owned "kitchen essentials" shop, packed with much, much more than just essentials. It's one of those places that has Le Creuset croquettes in more colors than I realized existed and spatulas to match. I could have spent hours there, but I was with JR and we had approximately 10 minutes until our take out late lunch would be ready, so was forced to browse fast.

The timing for stumbling onto this jem was perfect: I was in need of a cupcake cookbook. One of my friends at work is a budding baker with a penchant for cupcakes. This past week marked the celebration of her birthday as well as a bittersweet going away gathering (she's soon transferring to another team: I'm very happy for her for the new opportunity but sad that it means I won't get to see her on a daily basis anymore). I had a fairly generic cupcake cookbook in one hand when I spotted The Hummingbird Bakery Cookbook.

If you've seen this cookbook, you will most likely understand why I was drawn to it. The cover pictures the most perfect-looking platter of buttery, sugary treats. Through a scan of the beautiful pages, I learn the platter's contents: Hummingbird brownies, hazelnut and chocolate cupcakes, blueberry cake, brooklyn blackout cake, a coconut and pineapple cupcake, and a perfectly pink vanilla cupcake. Sold.

When I made my purchase, I knew that in addition to gifting the cookbook, I'd make something out of it for the birthday girl. The perfectly pink vanilla cupcake fit the bill.

Robyn, this pink cupcake is for you - I know you aren't going far, but I miss you terribly already!

Vanilla Cupcakes
Makes 12

1 c. all purpose flour
a scant 3/4 c. sugar
1 1/2 tsp. baking powder
a pinch of salt
3 Tbsp. unsalted butter, at room temperature
1/2 c. whole milk
1 egg
1/4 tsp. pure vanilla extract
1 quantity vanilla frosting (recipe below)
sprinkles to decorate

Line a muffin tin with paper liners. Preheat oven to 325 degrees.

Put the flour, sugar, baking powder, salt, and butter in a freestanding electric mixer with a paddle attachment and beat on slow speed until you get a sandy consistency and everything is combined. Gradually pour in half the milk and beat until milk is just incorporated.

Whisk the egg, vanilla, and remaining milk together in a separate bowl for a few seconds, then pour into the flour mixture and continue beating until just incorporated (scrape any unmixed ingredients from the side of the bowl with a rubber spatula). Continue mixing for a couple more minutes until the batter is smooth. Do not overmix.

Spoon the batter into the paper cases until 2/3 full. Bake in preheated oven 20-25 minutes, or until light golden and the cake bounces back when touched. A skewer inserted in the center should come out clean. Let the cupcakes cool slightly in the pan before turning out onto a wire rack to cool completely.

Once the cupcakes have fully cooled, spoon vanilla frosting on top and decorate with sprinkles.


Vanilla Frosting
Makes enough to frost 12 cupcakes

2 c. confectioners' sugar
5 Tbsp. unsalted butter, at room temperature
2 Tbsp. whole milk
a couple drops of pure vanilla extract
a couple drops food coloring (optional)

Beat the sugar and butter together in a freestanding electric mixer with a paddle attachment on medium-low speed until the mixture comes together and is well mixed. Turn the mixer down to a lower speed. Combine the milk and vanilla in a separate bowl, then add to the butter mixture a couple of teaspoons at a time. Once all the milk has been incorporated, turn the mixer up to high speed. Continue beating until the frosting is light and fluffy, at least 5 minutes. The longer the frosting is beaten, the lighter and fluffier it becomes. Tint the frosting any shade you like with a couple of drops of food coloring mixed in until evenly incorporated.

One year ago: cauliflower curry
Blog Widget by LinkWithin

Popular Posts